
How to Build a Smart Home Under $300: A Room-by-Room Plan
A smart home no longer requires a refrigerator that talks to your phone or a house full of expensive connected appliances. Building a smart home under $300 mainly means choosing a few devices that solve everyday problems and making them work together. A useful starter setup can cover lighting, plugs, motion-based automation, entertainment and basic security without replacing existing appliances. In 2026, compatibility also matters more than ever: Google Home supports Matter-enabled devices alongside compatible third-party products, while devices that depend entirely on cloud services can become unusable if a manufacturer changes or ends its service. Google, for example, notes that Wemo cloud-dependent features stopped working after January 31, 2026. Explore how to build a smart home under $300 in this guide.
Start With One Ecosystem
The easiest way to waste a $300 budget is buying devices from five different ecosystems and discovering later that they do not cooperate properly.
Pick your primary platform first: Google Home, Amazon Alexa, Apple Home or another compatible system. If you are starting from scratch, Matter-certified products can make future expansion easier because Matter is designed to improve interoperability across supported smart-home platforms. Google Home can set up and manage Matter-enabled devices directly, provided the required compatible hub and network conditions are available.
You do not need to buy everything from one manufacturer. You simply need to check compatibility before buying each device.
The $300 Budget
| Category | Suggested Budget | What to Buy |
|---|---|---|
| Smart speaker/hub | $40-$60 | Voice control and routines |
| Living room | $45-$60 | Smart plugs and lighting |
| Bedroom | $40-$50 | Bulb and sensor |
| Kitchen | $30-$40 | Smart plugs |
| Entryway | $30-$40 | Motion/contact sensor |
| Security | $50-$60 | Basic smart camera |
| Reserve | $20-$30 | Cables or replacement device |
| Total | $255-$340 | Adjust based on sales |
Estimate prices.
To stay below $300, prioritize automation over buying a device for every possible function. The exact prices will vary by country, brand and promotions, so treat the figures as a planning budget rather than fixed retail prices.
Living Room: Make the Biggest Difference First
Start here because the living room usually has several devices that can benefit from automation. A smart bulb can handle scheduled lighting, while one or two smart plugs can control lamps, fans or other suitable appliances.
Add a smart speaker or display as the central control point. You can then create routines such as turning the lights on at sunset or switching off selected devices when you say a bedtime command.
Do not put high-power appliances into a smart plug unless the plug is specifically rated for that load. A smart plug is excellent for a lamp, but that does not automatically make it appropriate for every heater, cooler or high-wattage appliance.
Bedroom: Automate Around Your Routine
The bedroom does not need five smart devices. One adjustable smart bulb and a simple sensor can already create useful automation.
Set the lights to dim gradually before bedtime, switch them off automatically after you leave or turn on a low-brightness light when motion is detected during the night. The objective is not to make the room “smart” for its own sake. It is to remove small repetitive actions.
Practical tip: Keep a physical switch available. If your smart-home system fails, you should still be able to control the light manually.
Kitchen: Use Smart Plugs Carefully
The kitchen is where smart-home enthusiasm needs a little restraint. A smart plug can make sense for devices that are designed to restart safely when power is restored, but you should not remotely automate appliances that could create a fire, overheating or other safety risk.
A better starting point is a lamp, compatible coffee setup or another low-risk device. You can create routines around your morning schedule rather than buying expensive smart versions of appliances you already own.
Entryway: Add Sensors Before More Gadgets
A motion or contact sensor can provide more useful automation than another smart bulb.
A door sensor can trigger a notification when a door opens, while a motion sensor can turn on an entryway light when someone arrives. This is also where inexpensive automation starts to feel genuinely useful because the system reacts to what is happening rather than waiting for a voice command.
Security: One Camera Is Enough to Start
- A basic indoor or outdoor smart camera can fit into the budget, but do not buy several cameras simply because they are inexpensive.
- Start with the location where visibility matters most, such as the main entrance.
- Pay attention to privacy controls, storage options, account security and whether recordings require a subscription.
- A camera that sends everything to a cloud service may have different privacy implications from one offering local storage.
This matters because connected-home security is not just about the camera itself. Research has demonstrated that vulnerabilities in seemingly simple smart bulbs and plugs can potentially expose credentials and network information, showing why firmware updates and reputable products matter.
Where Automation Really Saves Money
A $300 smart home should not be judged by the number of devices installed. Its value comes from what those devices allow you to automate.
For example, a useful evening routine could switch off selected lights, turn off a suitable plug-controlled device and adjust other connected equipment with one command. A morning routine could turn on a lamp and provide a weather update while you prepare for work.
Google Home supports automations, voice commands and remote control for compatible devices, including Matter products.
That is far more useful than owning ten smart bulbs that you still control individually.
Recommended $300 Build
| Room | Product | Approx. Budget |
|---|---|---|
| Living room | Echo Dot 5th Gen | $50 |
| Living room | 2 smart bulbs | $25 |
| Kitchen | Tapo P125M 3-pack | $25 |
| Bedroom | 2 smart bulbs | $25 |
| Entryway | Motion/contact sensor | $25-30 |
| Security | Wyze Cam v4 | $45 |
| Extra plugs | 2-3 smart plugs | $20-30 |
| Estimated total | $215-230 |
Prices may vary by site and location.
Avoid the Cloud-Only Trap
One of the biggest lessons for how to build a smart home under $300 successfully is to think about what happens five years from now.
A device may work perfectly today but become less useful if its manufacturer shuts down its cloud platform. Google’s documentation provides a current example with Wemo devices whose cloud-dependent functionality stopped working in 2026.
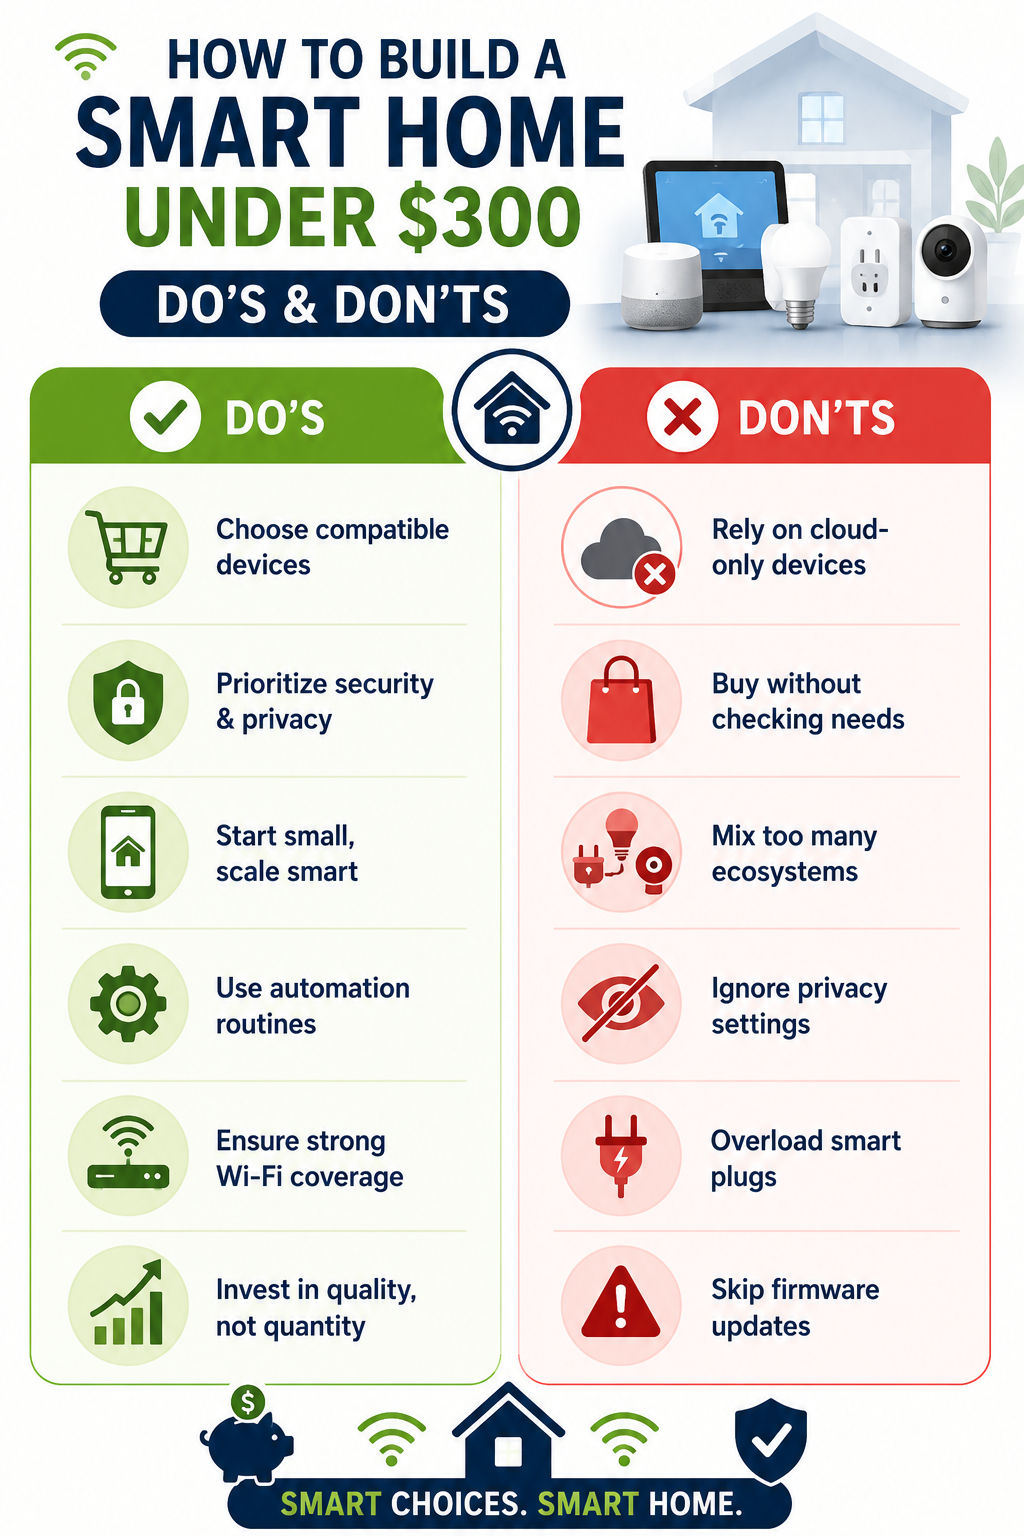
When comparing devices, look for Matter support, local control, physical controls and clear manufacturer support policies. You do not need every device to work offline, but having some local functionality makes the system less dependent on a company’s servers.
A Better $300 Buying Strategy
Instead of spending the entire budget immediately, start with the central speaker or hub, two smart bulbs, two smart plugs and one sensor. Use them for a couple of weeks.
Then ask which routine you actually wish you had. If lighting is the biggest improvement, expand there. If you keep checking the front door, add a sensor or camera. If you discover that smart plugs are doing most of the useful work, buy more of them rather than chasing expensive gadgets.
This approach makes building a smart home under $300 much more practical because you spend based on actual behaviour rather than a shopping list.
Practical Tips Before You Buy
- Check compatibility first: Look for Matter or your chosen platform’s compatibility badge before ordering.
- Measure Wi-Fi coverage: A device that repeatedly loses connection will ruin an otherwise good setup.
- Keep physical controls: Smart functionality should add convenience, not remove basic manual control.
- Update firmware: Install security updates when manufacturers release them.
- Secure your account: Use a strong password and multifactor authentication where available.
- Avoid unnecessary subscriptions: Check whether essential features require recurring payments.
- Start with routines: Automations often provide more value than buying additional hardware.
Google recommends keeping devices close to the Wi-Fi router during setup, typically around 15-20 feet, to make initial pairing smoother.
Is $300 Really Enough?
Yes, if your definition of a smart home is useful automation rather than a showroom full of connected gadgets.
The strongest starter setup combines a voice assistant or hub, a handful of smart lights and plugs, one or two sensors and a carefully selected security device. How to build a smart home under $300 ultimately comes down to deciding which repetitive tasks are worth automating and refusing to spend money on technology that does not solve a real problem.
The best smart home is not necessarily the one with the most devices. It is the one where you stop reaching for your phone because the house already knows what you are likely to need.
Frequently Asked Questions on How to Build a Smart Home Under $300
1. Do all smart devices need a hub?
No. Some Wi-Fi devices connect directly to your router, while others using Matter, Thread, Zigbee, or similar technologies may require a compatible hub or controller. Check the requirements before purchasing.
2. Is Matter worth considering in 2026?
Yes, particularly if you expect to mix brands or change platforms later. Matter is designed to improve interoperability, although individual device capabilities can still vary between platforms.
3. Can a smart home work without internet?
Some devices and automations can continue working locally, depending on the hardware and controller. Cloud-dependent features such as remote access and some notifications may stop when the internet is unavailable. Choosing devices with local-control options can improve resilience.
For how to build a smart home under $300, the smartest purchase is not necessarily the cheapest device. It is the device that works with your existing setup, solves a genuine problem and remains useful if the manufacturer’s app or cloud service changes. Start small, automate the boring tasks first and leave enough of the budget for expansion once you know what your home actually needs.
Also Read: How to Switch Careers into Tech in 12 Months Using Online Courses