
Skip to content
US Edition · Tuesday, Sep 29 2026 Deals & brand guides updated daily
How to Book Multi-Day Tours Online: A TourRadar Guide for First-Timers

How to Book Multi-Day Tours Online: A TourRadar Guide for First-Timers

Planning a multi-day trip online can be surprisingly complicated when you have to compare transport, accommodation, activities, meals, guides and cancellation terms separately. Booking multi-day tours online becomes much easier when you use a platform built specifically for organised trips. TourRadar currently lists more than 50,000 multi-day tours, safaris and river cruises, with options across destinations, travel styles and budgets. Its marketplace also works with more than 2,500 tour operators, so the real challenge is not finding a tour but working out which itinerary actually suits your trip. Learn how to book multi-day tours online with TourRadar by comparing itineraries, prices, reviews, inclusions, cancellation policies, and departure options.

How to Book Multi-Day Tours Online: A TourRadar Guide for First-Timers

Start With the Trip You Actually Want

Before opening TourRadar, decide what you want from the trip. A 10-day guided tour through Vietnam can look attractive on price alone, but the daily schedule may involve early starts, long drives and several hotel changes.

Write down four things first:

  1. Destination or region
  2. Number of travel days
  3. Approximate budget
  4. Preferred travel style

Then consider whether you want a small group, private tour, active adventure, cultural trip, family itinerary or a more relaxed experience.

This prevents you from choosing a tour simply because it has a high rating or discount.

Search TourRadar With Specific Filters

TourRadar lets you search by destination, departure month, number of travellers and other trip preferences. The platform’s listings include tours ranging from short breaks to extended multi-country itineraries.

Once you have search results, don’t open every tour individually. Narrow the list using your dates, budget, accommodation preference and activity level.

A useful first-time strategy is to shortlist three to five tours, rather than immediately booking the first appealing option.

Compare the Itinerary, Not Just the Price

Two tours with the same duration can provide completely different experiences.

What to Compare Why It Matters
Daily itinerary Shows how much time you actually spend travelling
Accommodation Determines comfort between activity days
Group size Changes the pace and overall experience
Included meals Affects your real trip budget
Transport Shows how destinations are connected
Optional activities Can significantly increase final spending
Reviews Reveal what the itinerary feels like in practice
Cancellation terms Protects you if plans change

Pay particular attention to “What’s Included” and “What’s Not Included.” A tour that appears cheaper may require you to pay separately for airport transfers, entrance fees, meals or activities.

Read Recent Reviews Differently

A 4.8-star rating looks reassuring, but the number alone doesn’t tell you whether the tour is right for you.

Read recent reviews and look for repeated comments about the guide, hotel quality, transportation, organisation and pace. If several travellers mention six-hour bus journeys or very early mornings, that information may matter more than the overall rating.

TourRadar says its platform features genuine traveller reviews covering tours, operators and destinations.

Also check whether complaints relate to the operator or circumstances outside its control. A weather-related itinerary change is different from repeated complaints about poor communication.

Check the Departure Before Paying

This is one of the most important steps for first-time users.

Some departures offer instant confirmation, while others require the operator to manually confirm availability. TourRadar says manually confirmed bookings typically take one to three business days, although timing can vary.

Some operators also offer guaranteed departures, meaning the trip will operate regardless of how many travellers book. If a departure is not guaranteed, check the terms before committing to expensive flights.

TourRadar specifically recommends waiting until the tour is fully confirmed before booking flights or other non-refundable travel arrangements.

Check the Room Arrangement Carefully

Accommodation can have a bigger effect on the total price than first-time travellers expect.

  • A tour may show a base price based on twin sharing. If you’re travelling alone and want your own room, a single supplement may apply.
  • During the booking process, TourRadar asks travellers to select accommodation such as twin, double, triple or single rooms, with the relevant price displayed.
  • Don’t assume the advertised price is what you personally will pay. Enter the correct number of travellers and room preference before comparing the final amount.

Look at Optional Extras Before Booking

A low advertised price can become considerably higher after adding extras.

Check whether the tour charges separately for:

  • Airport transfers
  • Extra hotel nights
  • Domestic flights
  • Entry fees
  • Optional excursions
  • Single-room supplements
  • Travel insurance

Some extras may be worthwhile, while others can be cheaper to arrange independently. The important thing is knowing about them before you commit.

Understand the Cancellation Policy

One of the easiest mistakes when learning how to book multi-day tours online is assuming that every tour has the same cancellation rules.

It doesn’t.

TourRadar states that cancellation policies are determined by individual operators and are shown on the tour detail page, checkout page and booking conversation page.

Some operators participate in TourRadar’s Peace of Mind options, which can allow date changes, alternative adventures or future-tour credit depending on the booking. These options are not available on every tour.

Read the policy before paying, particularly if your flights are already booked.

Complete the Booking Carefully

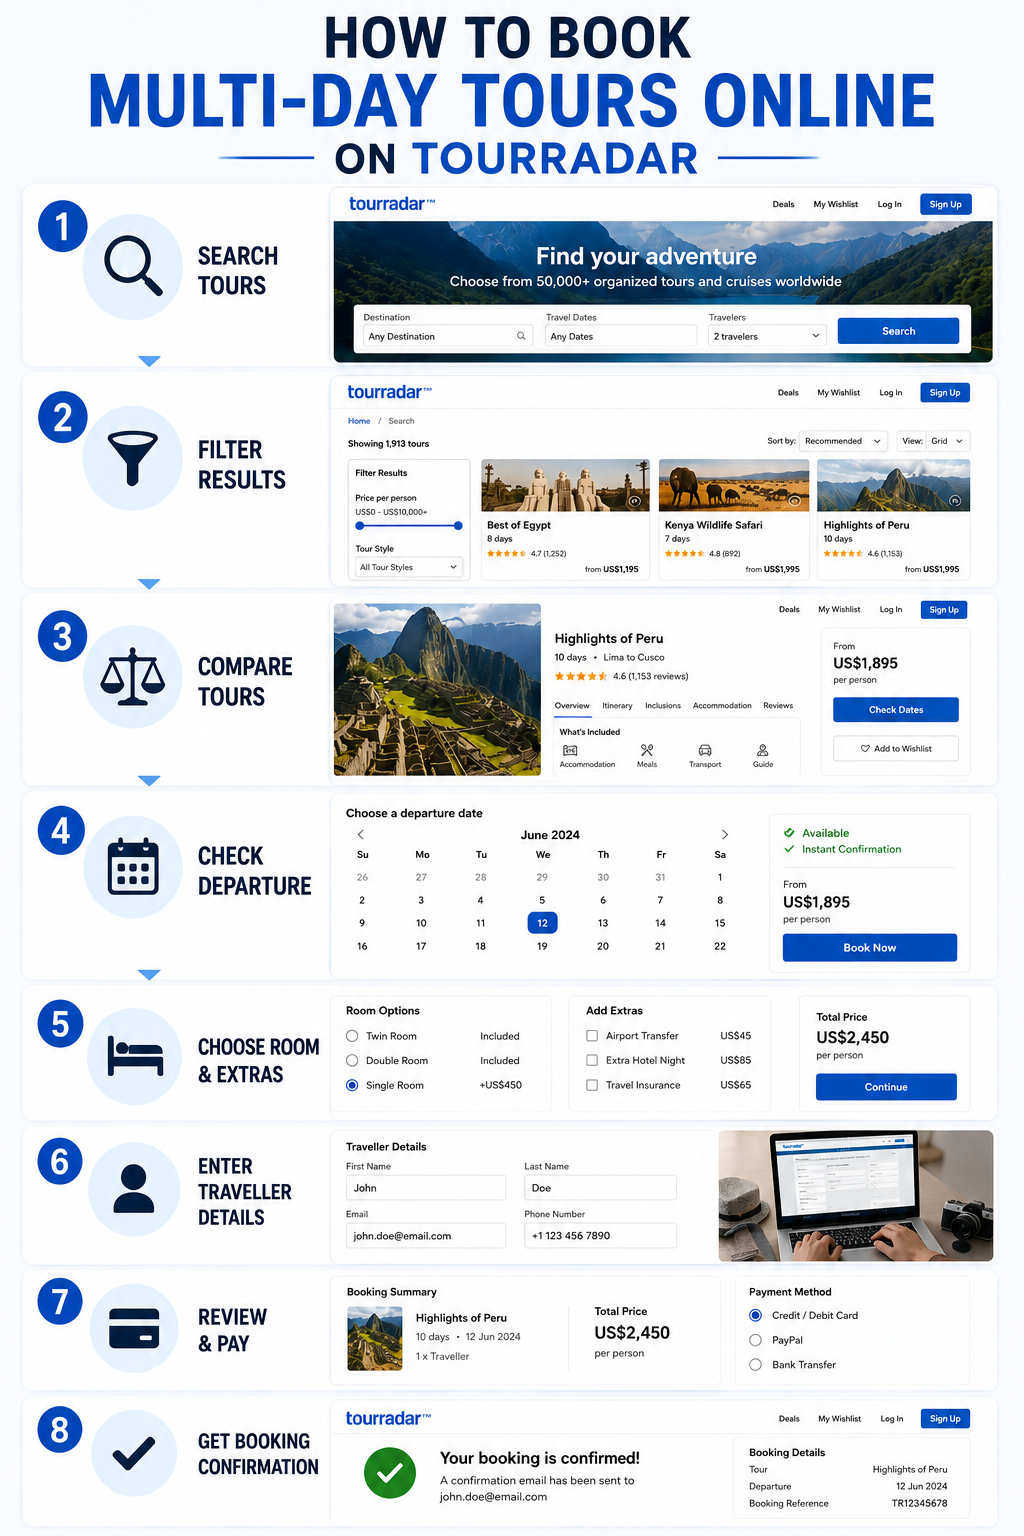
Once you’ve selected your departure, TourRadar’s booking process asks for the number of travellers, accommodation, optional extras, traveller details, insurance where available and payment information. Depending on how far in advance you’re travelling, payment options can include deposits or instalments.

Before clicking the final booking button, check:

Names → Dates → Number of travellers → Room type → Final price → Cancellation terms → Included services

A spelling error in a traveller’s name or an incorrect date is much easier to fix before the booking is submitted.
How to Book Multi-Day Tours Online

What Happens After Booking?

After booking, you’ll receive a confirmation email and access to a booking conversation page, where you can communicate with the operator and receive updates. If the tour requires manual confirmation, your payment method may initially show a pending authorisation rather than a completed charge.

Keep this page accessible throughout your trip planning because it becomes the central record for booking-related communication.

If the operator cancels the tour, TourRadar says travellers will be notified and may be offered options such as rescheduling, a refund or an alternative tour, depending on the operator’s terms.

Practical Tips for First-Time TourRadar Users

The smartest approach to booking multi-day tours online is to treat the booking as a comparison exercise rather than an impulse purchase.

Save three comparable tours, calculate their real costs, read the newest reviews and compare the daily schedules. If two tours cost roughly the same, choose the one with clearer inclusions and a cancellation policy that gives you more flexibility.

Also avoid booking flights immediately after submitting a tour request. Wait for confirmation and, ideally, verify whether your selected departure is guaranteed.

Finally, save copies of your confirmation, itinerary, payment details and operator communications offline. You’ll appreciate having them if you lose internet access while travelling.

Frequently Asked Questions on How to Book Multi-Day Tours Online

1. Is TourRadar suitable for first-time tour travellers?

Yes. It is designed around organised multi-day adventures and lets travellers compare itineraries, operators, reviews, dates and prices in one place.

2. How far ahead should I book?

There is no universal timeframe. Popular departures, peak-season trips and tours with limited availability should generally be booked earlier. For less competitive dates, you may have more flexibility.

3. Can I cancel a TourRadar booking?

Potentially, but the rules depend on the tour operator and booking terms. Check the cancellation policy before paying because fees or non-refundable portions may apply.

For first-time travellers, knowing how to book multi-day tours online is ultimately about what you’re getting for your money before you pay. TourRadar can simplify the search, but the best decision still comes from comparing the itinerary, operator, reviews, inclusions and cancellation terms rather than choosing the biggest discount on the screen.

Also Read: How to Find Genuinely Cheap Hotels: Trivago, Metasearch, and Timing Tricks
VPN Speed Explained: Why Your Connection Slows and How to Fix It

VPN Speed Explained: Why Your Connection Slows and How to Fix It

VPN speed is often blamed when a connection suddenly feels slower, but the VPN itself is only one part of the equation. Your original internet connection, distance to the VPN server, encryption method, server congestion, Wi-Fi quality and even the website you are accessing can all affect performance. A fast 500 Mbps broadband connection, for example, does not guarantee 500 Mbps through a VPN. Encryption adds processing, traffic takes a longer route, and the VPN server becomes another point between your device and the internet. The good news is that a large slowdown is not inevitable. With the right server, protocol and network settings, most users can recover much of their normal performance.

VPN Speed Explained: Why Your Connection Slows and How to Fix It

What Actually Happens When You Use a VPN?

Without a VPN, your device normally connects to your internet service provider and then to the website or service you are using.

A VPN adds an encrypted tunnel between your device and a VPN server. Your traffic travels through that server before reaching its destination.

That extra journey creates three main sources of slowdown:

  • Encryption: Your device and the VPN server must encrypt and decrypt traffic.
  • Distance: Data may travel hundreds or thousands of extra kilometres.
  • Server load: Your connection shares the VPN infrastructure with other users.

There is also an important distinction between speed and latency. Speed affects how quickly large files or videos can transfer, while latency measures the delay before data starts moving. A VPN can leave your download speed reasonably high while noticeably increasing latency, which becomes more obvious during gaming, video calls and remote desktop sessions.

The Biggest Causes of VPN Slowdowns

Cause What You May Notice What Usually Helps
Distant server Higher latency Choose a nearby server
Server congestion Unstable speeds Change server
Heavy encryption Lower throughput Try a modern protocol
Weak Wi-Fi Slow connection everywhere Improve Wi-Fi
ISP limitations Low speed before VPN Check baseline speed
VPN app settings Unexpected slowdown Review protocol/settings
Device limitations Slow performance on one device Test another device

How to Fix VPN Slowdowns

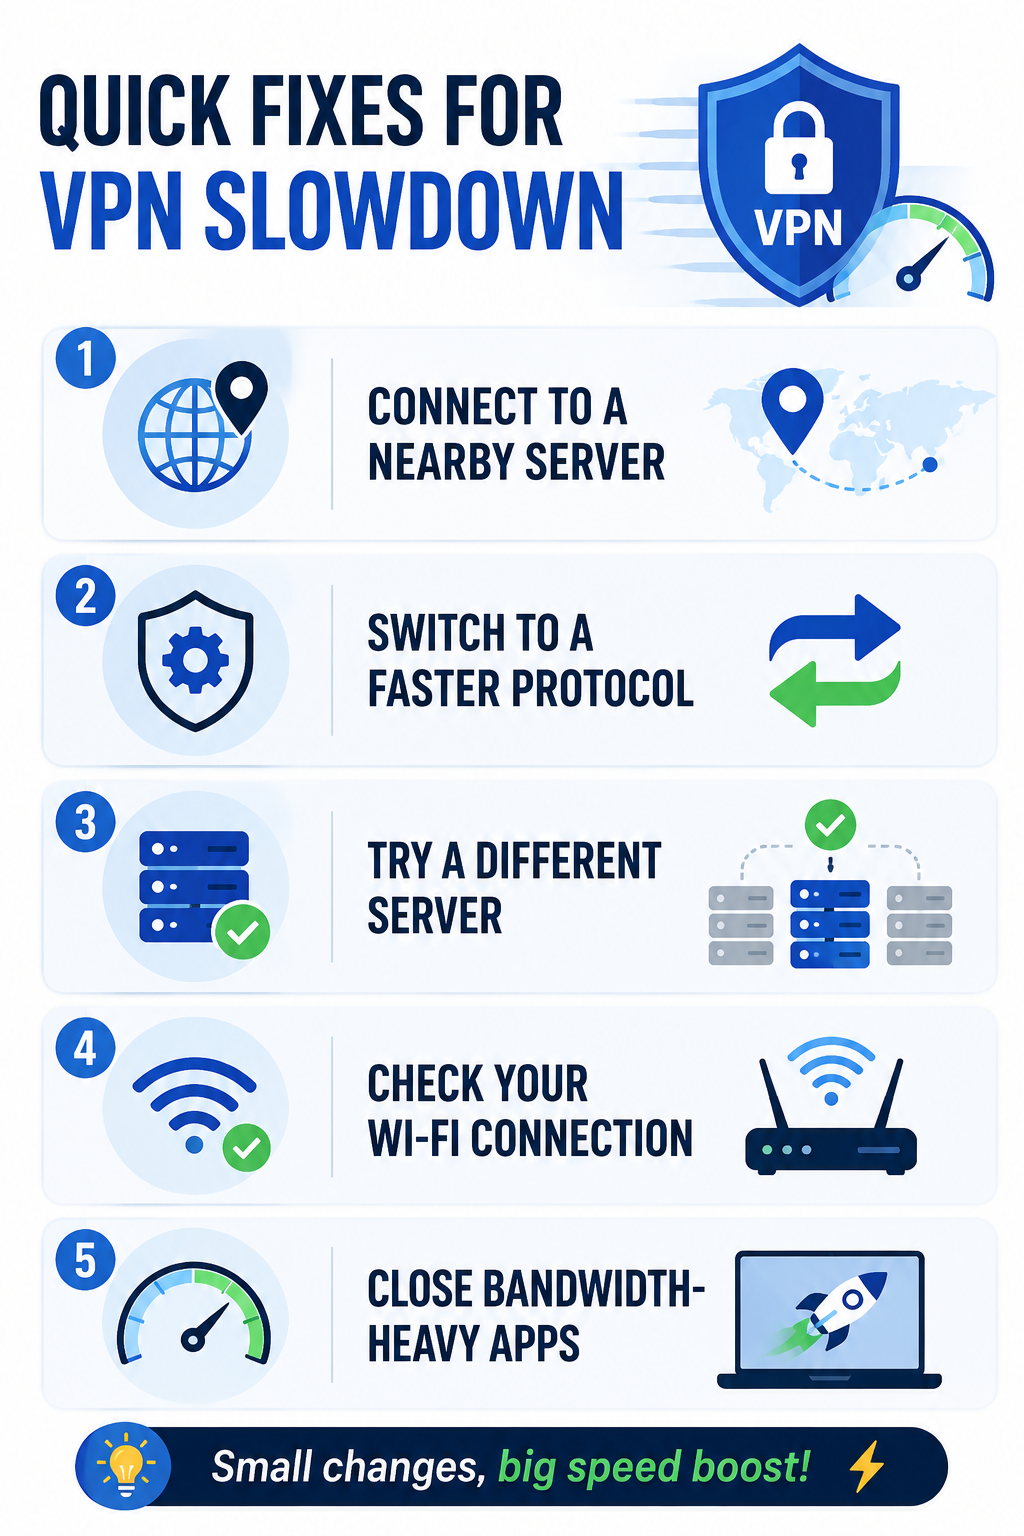
1. Check Your Normal Speed First

Before changing anything inside your VPN app, switch the VPN off and run a speed test.

This gives you a baseline.

If your internet connection delivers only 80 Mbps without the VPN, there is little point expecting 300 Mbps while connected to one. Likewise, if you normally receive 500 Mbps but get only 40 Mbps through the VPN, you have a genuine performance problem worth investigating.

Run the test several times at different times of day. Internet speeds fluctuate because of Wi-Fi interference, household traffic and ISP congestion.

2. Choose a Nearby Server

The simplest solution is often the most effective.

If you are physically located in New York and connect to a VPN server in Singapore, your traffic has a much longer journey than it would through a server in New York, Chicago or another nearby location.

You do not always need the geographically closest server, because a nearby server can be congested. Try two or three locations in the same region and compare their results.

For streaming or browsing, a nearby server is usually preferable unless you specifically need an IP address from another country.

3. Change the VPN Protocol

The protocol determines how your VPN connection is established and how data moves through the encrypted tunnel. Different protocols can produce noticeably different performance.

Modern options such as WireGuard are designed with speed and efficiency in mind and are now widely supported by commercial VPN providers. OpenVPN remains popular because of its maturity and flexibility, but it can perform differently depending on the device and configuration.

If your VPN application offers a protocol selection, test the available options rather than assuming the default is optimal.

This is one of the easiest ways to improve VPN speed without changing your internet plan.

4. Stop Connecting to an Overloaded Server

A VPN provider might advertise thousands of servers, but that does not mean every server will perform equally well.

During busy periods, a popular server can become congested. You may notice slow downloads, buffering or inconsistent performance even though your normal internet connection is working perfectly.

If the application displays server load, use it as a guide. Otherwise, connect to another nearby server and compare.

Do not automatically choose a server labelled “fastest” either. Test it yourself. Your physical location, ISP and network route can produce different results from another user’s experience.

5. Check Whether Wi-Fi Is the Real Problem

Sometimes the VPN gets blamed for a problem that already exists on the local network.

  • Try connecting your computer directly to the router with Ethernet. If performance improves dramatically, your Wi-Fi is probably contributing to the slowdown.
  • You can also test from a different room, move closer to the router or switch between the 2.4 GHz and 5 GHz/6 GHz bands where supported.
  • If the connection is slow with the VPN turned off, fixing the local network should come before changing VPN providers.

6. Turn Off Features You Don’t Need

Some VPN applications include additional privacy and security functions such as malware filtering, tracker blocking, double VPN routing or specialised servers.

These can be useful, but certain features deliberately send your traffic through additional processing or servers.

For ordinary browsing, you generally do not need a multi-hop connection simply to maximise performance. If your VPN has several advanced routing options enabled, temporarily disable them and compare the result.

The objective is not to turn off security unnecessarily. It is to understand which features are affecting performance.

7. Test Different Websites and Services

A slow VPN connection does not always mean the VPN is slow.

The website you are visiting may have overloaded servers, bandwidth limitations or a poor route to your VPN provider. A video platform might work perfectly while a particular download server performs badly.

Test several destinations. Try a speed-test service, a major website and the service that is actually giving you trouble.

If only one website is slow, replacing your VPN may not solve the problem.

8. When Changing VPN Providers Makes Sense

If you have tested nearby servers, different protocols, your Wi-Fi and multiple destinations, and the connection remains dramatically slower, the provider may simply have poor infrastructure for your location.

Look beyond marketing claims such as “the world’s fastest VPN.” What matters is how the service performs from your country, ISP and devices.

Before subscribing for a long period, use a provider’s trial or money-back period to test several servers at different times of day. Download a large file, stream high-resolution video and run latency tests rather than relying on a single speed-test result.

Practical Fixes Worth Trying

If your VPN speed has suddenly dropped, work through these steps in order:

  • Test your internet without the VPN.
  • Restart the VPN connection.
  • Switch to a nearby server.
  • Try another server in the same city or country.
  • Change from a slower protocol to WireGuard if available.
  • Test Ethernet instead of Wi-Fi.
  • Close bandwidth-heavy applications.
  • Disable unnecessary multi-hop or advanced routing features.
  • Update the VPN application.
  • Test again at a different time.

This process is more useful than immediately uninstalling the VPN because it helps identify where the slowdown actually originates.

VPN Speed

Does a Faster VPN Always Mean Better Privacy?

No. Performance should not be evaluated separately from privacy and security.

A provider might deliver excellent speeds while offering weak privacy practices, questionable logging policies or limited security controls. Conversely, a privacy-focused VPN may sacrifice some performance because of its infrastructure or security configuration.

The sensible approach is to find a service that provides the security features you need while delivering acceptable performance for your particular connection.

Frequently Asked Questions

1. How much speed does a VPN normally reduce?

There is no universal percentage. The impact depends on your ISP, device, protocol, server distance, congestion and network conditions. A nearby, well-connected server can perform much better than a distant or overloaded one.

2. Why is my VPN fast for browsing but slow for downloads?

Different activities use bandwidth differently. A download can expose throughput limitations that are barely noticeable when loading ordinary webpages. The download server itself may also be limiting your connection.

3. Does VPN location affect speed?

Yes. A distant server generally increases latency and can reduce performance because your data has to travel farther. Nearby servers are usually the better choice when location masking is not your primary requirement.

The most useful way to think about VPN speed is not as a fixed number advertised by a provider, but as the performance you actually receive between your device, VPN server and destination. Start with a baseline, choose nearby infrastructure, test protocols and eliminate local network problems before deciding that the VPN itself is the problem.

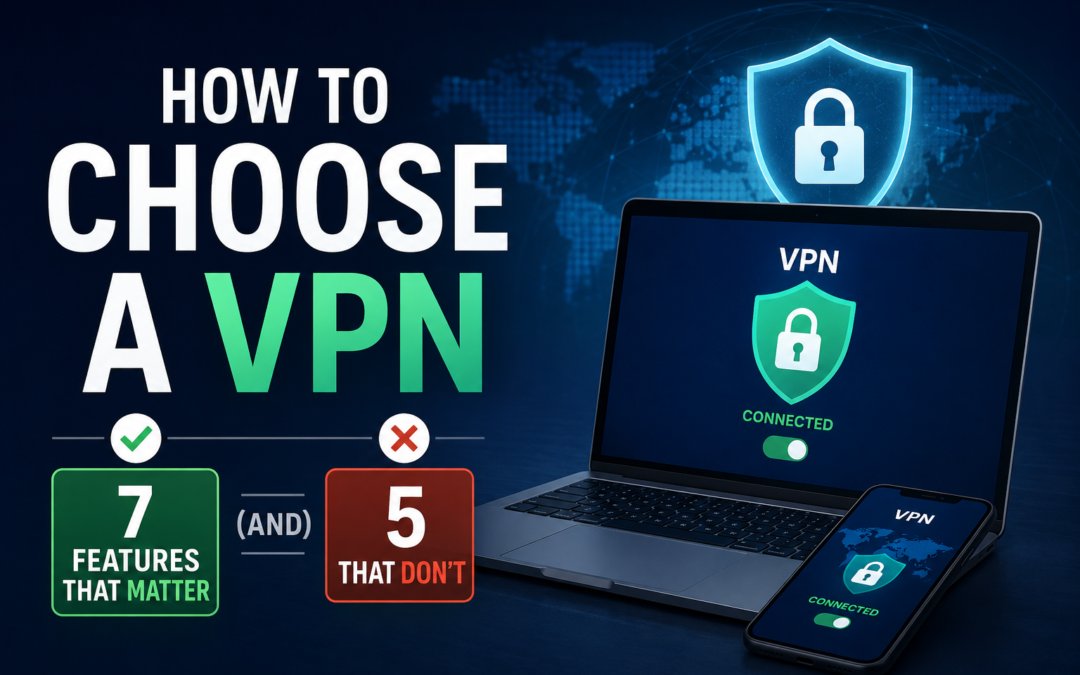
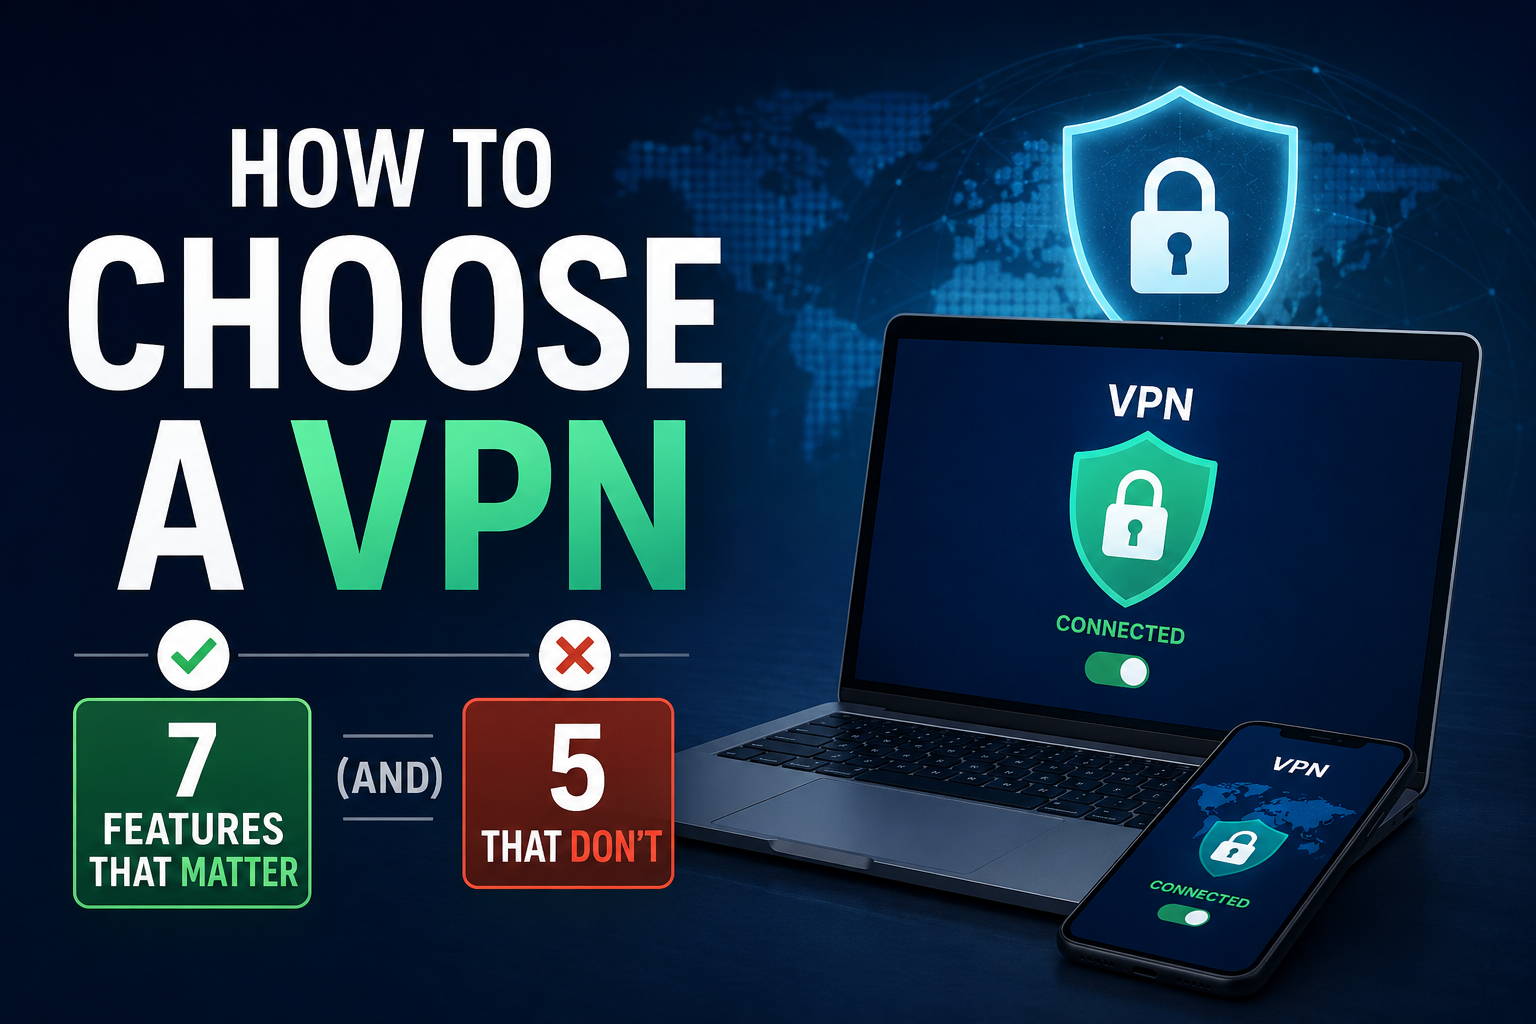
How to Choose a VPN: 7 Features That Matter (and 5 That Don’t)

How to Choose a VPN: 7 Features That Matter (and 5 That Don’t)

Choosing a VPN in 2026 is less about picking the provider with the biggest server count and more about matching the service to how you actually use the internet. How to choose a VPN starts with understanding what you want to protect. A frequent traveller may need reliable connections on hotel Wi-Fi, a remote employee may care about split tunnelling and a kill switch, while a privacy-focused user should be more concerned about logging practices and independent audits.

Services such as ExpressVPN, Surfshark and NordVPN now offer far more than basic IP masking. The trick is separating genuinely useful features from marketing extras. Learn how to choose a VPN by comparing speed, security, privacy, server locations, device support, pricing, and features that actually matter, in this blog.

How to Choose a VPN: 7 Features That Matter (and 5 That Don't)

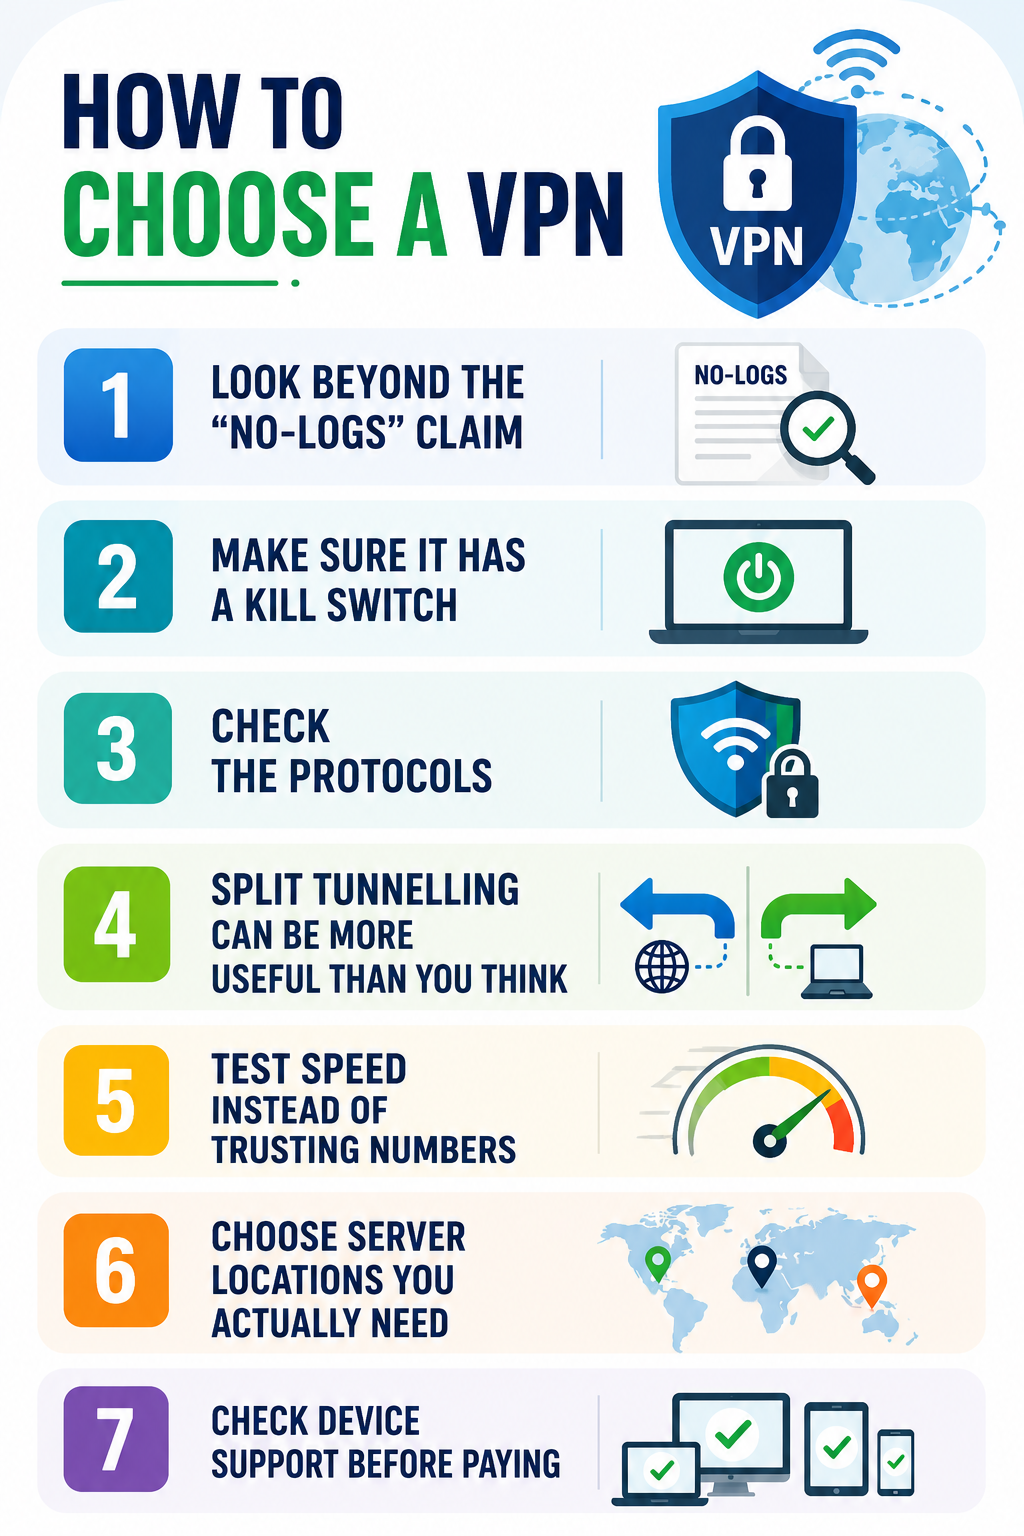
1. Look Beyond the “No-Logs” Claim

A VPN provider can potentially see information about your connection, so its data practices deserve more attention than the colour of its app or the number of countries advertised.

Do not stop at a “no-logs” badge. Read what the company actually says it stores, whether connection data is retained and whether its claims have been independently examined. ExpressVPN, for example, says its TrustedServer technology uses RAM-only servers and that its no-logs policy has been independently audited.

Practical tip: Before subscribing, search the provider’s privacy policy for terms such as activity logs, connection logs, IP address, timestamps, diagnostic data and third-party sharing. If the explanation is difficult to understand, that itself is worth considering.

2. Make Sure It Has a Kill Switch

A VPN is useful only while its protected connection is active. If that connection suddenly drops, your device could revert to its normal internet connection.

A kill switch prevents this by blocking internet traffic when the VPN disconnects. ExpressVPN calls its feature Internet Kill Switch, while Surfshark and NordVPN offer similar protection.

This is particularly useful when travelling or working from public networks.

Practical tip: Do not simply assume the feature works. After installing the VPN, enable the kill switch and test what happens when you manually disconnect the VPN. Check that your internet traffic stops rather than continuing normally.

3. Check the Protocols

VPN protocols affect how your connection balances security, speed and reliability. You do not need to understand the underlying cryptography, but you should avoid choosing a provider simply because it promises “military-grade security.”

ExpressVPN’s Lightway protocol is designed for quick connections and stable switching between networks, while NordVPN supports NordLynx alongside OpenVPN and other protocols.

Practical tip: If the VPN gives you a protocol choice, test the recommended modern protocol first. If connections become unstable, try another supported protocol rather than immediately changing providers.

4. Split Tunnelling Can Be More Useful Than You Think

Split tunnelling allows some apps to use the VPN while other traffic goes directly through your normal connection. This becomes useful when you need a VPN for work but still want local services to operate normally.

ExpressVPN’s split tunnelling, for example, can allow selected applications to use the VPN while devices such as printers and local network services remain accessible. Surfshark offers a similar feature called Bypasser.

Practical tip: If your work software requires a VPN but your banking app or smart-home devices behave strangely while it is active, try split tunnelling before disabling the VPN completely.

5. Test Speed Instead of Trusting Numbers

A VPN inevitably adds another step between your device and the destination website. The impact can vary according to your location, server load, protocol and distance from the selected server.

A provider claiming to have thousands of servers does not automatically mean it will be faster for you.

Practical tip: Test a VPN from your normal location at different times of day. Try a video call, a large download and an ordinary browsing session. Real-world performance tells you more than a promotional speed figure.

6. Choose Server Locations You Actually Need

Server coverage matters, but only in relation to your own routine. If you regularly travel between India, Europe and Southeast Asia, those locations matter more than having hundreds of additional countries you will never use.

Surfshark advertises more than 4,500 servers, while NordVPN’s network covers a large number of locations worldwide.

Practical tip: Make a list of five countries you genuinely expect to connect from or to. Check whether the provider has suitable locations there before comparing headline server numbers.

7. Check Device Support Before Paying

A VPN subscription is not particularly useful if it works well on your laptop but creates problems on your phone, tablet or smart TV.

Consider the devices you actually use. ExpressVPN, Surfshark and NordVPN support multiple major platforms, but specific features can differ between operating systems.

Practical tip: Check whether the exact feature you want, such as split tunnelling or a kill switch, is available on your operating system. Do not assume that a feature advertised on the provider’s homepage works identically everywhere.

How to Choose a VPN

Five Features That Shouldn’t Decide Your Purchase

Not every extra feature is useless, but these should not outweigh privacy, security and reliability when you’re comparing providers.

  • Huge server count: More servers do not necessarily mean better speed or reliability.
  • Dedicated IP: Useful for specific business needs, but unnecessary for most everyday users.
  • Built-in extras: Antivirus, storage and other add-ons can be convenient but are not essential VPN features.
  • Unusual location tools: Features such as GPS spoofing are helpful only for particular use cases.
  • “Complete anonymity” claims: A VPN can improve privacy, but it cannot make you completely anonymous online.

A dedicated IP, for example, can be useful for business systems that repeatedly check your IP address, but it is unnecessary for ordinary browsing. Surfshark and ExpressVPN both offer dedicated or static IP options for specialised use cases.

Likewise, bundled antivirus, password managers or cloud storage can be convenient, but do not pay extra for them if you already use separate tools you prefer.

How to Choose a VPN Based on Your Situation

The most useful way to think about how to choose a VPN is to start with the situation rather than the brand.

Your Situation Prioritise
Frequent traveller Kill switch, speed, server coverage
Remote worker Split tunnelling, reliability, dedicated IP
Public Wi-Fi user Encryption, leak protection, kill switch
Privacy-focused user No-logs evidence, audits, secure protocols
Streaming user Speed, nearby servers, stable connections
Occasional home user Simplicity, price and basic protection

If you are comparing ExpressVPN, Surfshark and NordVPN, do not ask which one is universally “best.” Ask which one fits your devices, locations, budget and privacy requirements.

For example, ExpressVPN’s Lightway and split tunnelling make it interesting for people who move between networks and need flexible routing. Surfshark’s Bypasser, NoBorders and kill switch can appeal to users who want more control over which traffic goes through the VPN. NordVPN offers multiple protocols, DNS leak protection, and an automatic kill switch alongside its broader security features.

Practical VPN Buying Checklist

Before entering your payment details, spend five minutes checking these points:

  • Read the complete privacy policy, not just the homepage.
  • Confirm the kill switch works on your device.
  • Check available server locations for your regular destinations.
  • Test speeds during your normal usage.
  • Check whether split tunnelling is supported on your operating system.
  • Review the renewal price rather than only the introductory offer.
  • Check the refund or trial conditions before subscribing.
  • Avoid providers promising complete online anonymity.

This is where how to choose a VPN becomes much easier. You do not need every feature. You need the handful that solve your actual problems without introducing unnecessary cost or complexity.

Frequently Asked Questions on How to Choose a VPN

1. Is a more expensive VPN automatically better?

No. Price does not guarantee better privacy or performance. Compare logging practices, security features, speed, device support and independent verification before considering the subscription cost.

2. Do I need a dedicated IP?

Usually not. It becomes useful when a business service, remote-access system or other application benefits from a consistent IP address.

3. Is a VPN enough to protect my device?

No. A VPN protects network traffic, but it does not replace software updates, strong passwords, multifactor authentication, backups or protection against phishing and malware.

Ultimately, choosing a VPN is not about finding the provider with the most impressive feature page. It is about identifying the risks you actually face and paying for features that address them. For most users, privacy practices, a reliable kill switch, modern protocols, leak protection, useful server locations and consistent speed matter far more than a giant server counter or a bundle of unrelated extras.

How to Find Genuinely Cheap Hotels: Trivago, Metasearch, and Timing Tricks
How to Find Genuinely Cheap Hotels: Trivago, Metasearch, and Timing Tricks
Hotel prices can change dramatically for the same room, same dates and same property, which makes finding a genuinely cheap stay less about luck and more about comparing the right things. Your how to find cheap hotels search starts with understanding how hotel pricing actually works: rates vary by demand, booking channel, cancellation terms, location and even the night of the week you stay. In 2026, Hotels.com data found that booking closer to the trip can sometimes pay off, with its latest Hotel Price Index identifying the final two weeks before travel as a strong window for savings and reporting that last-minute bookers saved an average of 26% versus people booking four or more months ahead.

How to Find Genuinely Cheap Hotels

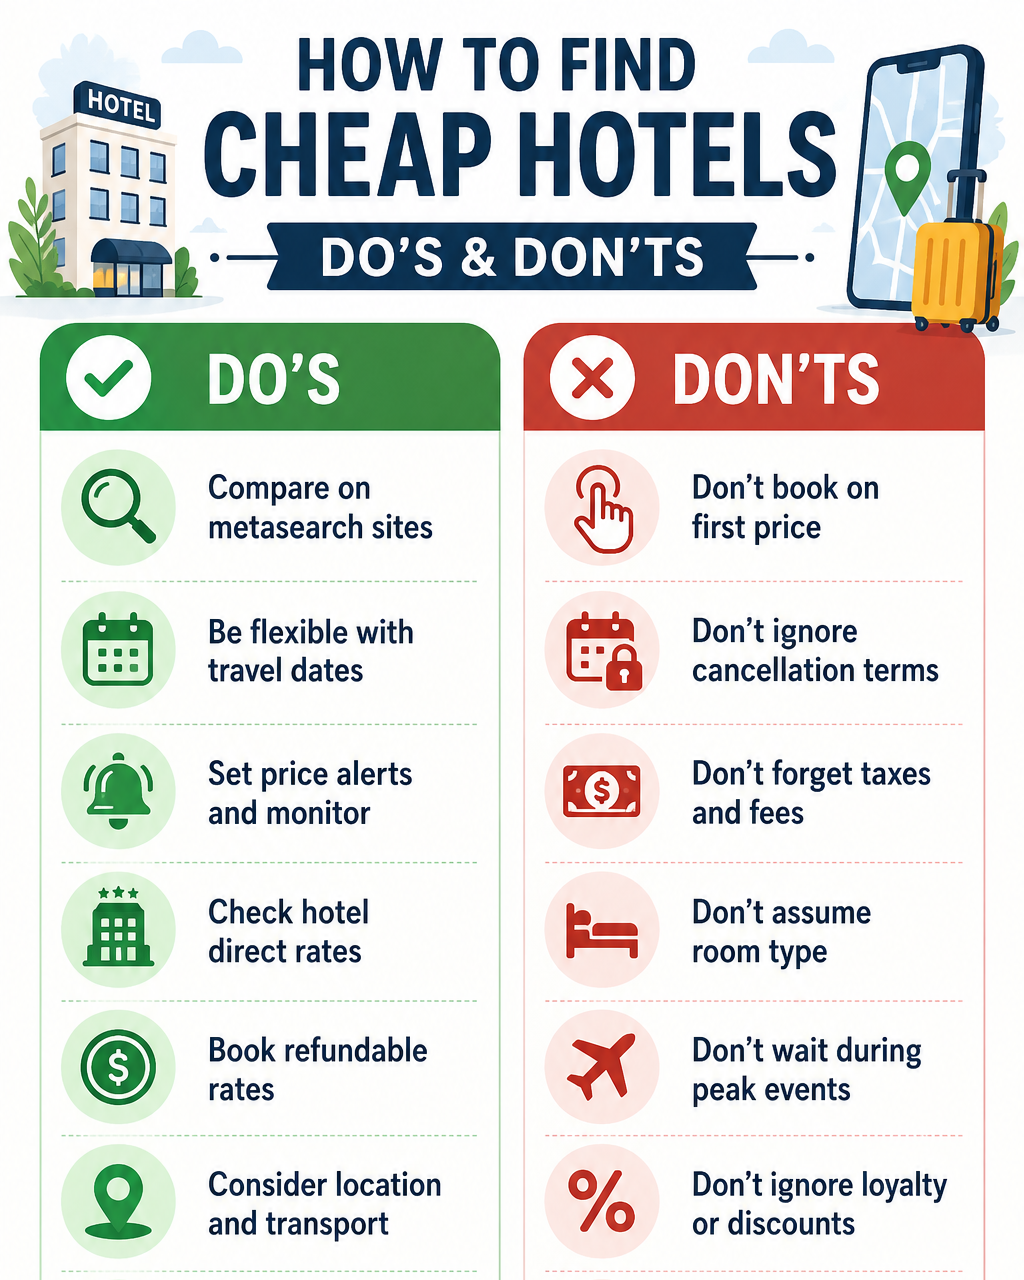
Start With a Metasearch Engine, Not One Booking Site

The biggest mistake is checking one hotel website and assuming its price is the market price.

A metasearch engine such as trivago compares accommodation offers from hundreds of booking sites, including online travel agencies, hotel chains and independent properties. Trivago says its platform covers more than 2.5 million accommodations across approximately 190 countries.

That gives you a much better starting point because the same hotel may appear at different prices depending on which booking site is selling the room.

But don’t simply click the cheapest number you see.

Trivago itself warns that rates and availability change constantly, and the final price can occasionally differ after you are redirected to the booking site. Always check the checkout page before paying.

Compare the Same Room, Not Just the Same Hotel

This is one of the most useful money-saving tricks.

Suppose you see a hotel for $82 on one site and $91 on another. The $82 option is not necessarily cheaper once you compare: Room type, number of guests, breakfast, taxes, resort or destination fees, cancellation policy, payment timing, included parking, Wi-Fi and other essentials.

A $91 refundable room can be a better deal than an $82 non-refundable room if your plans are uncertain.

Practical trick: Open the two cheapest offers side by side and compare the final payable amount, not the headline nightly rate.

Use Trivago’s Filters Properly

Trivago allows you to filter by price, rating, location, property type and amenities such as breakfast, parking, Wi-Fi and free cancellation. Its map is particularly useful because a slightly cheaper hotel can become more expensive once you factor in daily transportation.

Try this approach:

  1. First search: Your preferred neighbourhood
  2. Second search: Expand the map by 1-3 miles
  3. Third search: Compare the total cost of the hotel plus transportation

A $75 hotel requiring $25 of daily transportation is not cheaper than a $90 hotel within walking distance of your destination.

Don’t Assume Tuesday Is Always Cheapest

One of the most repeated hotel-booking myths is that there is one universally cheapest day to book.

There isn’t.

Hotel pricing depends heavily on destination, season and demand. Historical Expedia data has found Fridays to be relatively inexpensive booking days in some datasets, while Hotels.com’s 2026 data focuses more on when you stay, reporting Sunday as the cheapest check-in day for U.S. stays and Saturday as the most expensive.

The useful lesson is not “always book on Friday.” It is to compare different check-in dates when your schedule allows.

Shift Your Stay by One Night

This can produce a surprisingly large difference.

  • If you’re planning a three-night stay from Friday to Monday, check Thursday to Sunday and Saturday to Tuesday as well.
  • Business hotels can be expensive during weekday demand, while leisure destinations often become more expensive around weekends.
  • Hotels.com’s 2026 analysis found that U.S. travellers could save around 15% by starting a stay on Sunday instead of Friday.

Practical trick: When searching, change the check-in date by one day in both directions. It takes less than a minute and can reveal a meaningful price difference.

Don’t Book Four Months Early Just Because You Can

Early booking makes sense when rooms are limited, but it is not automatically the cheapest strategy for ordinary hotel stays.

Hotels.com’s 2026 data identified an 8-14-day window as a strong booking period in one analysis and also found substantial last-minute savings in its broader dataset.

This does not mean you should wait until the last minute for a major festival, conference or holiday weekend. In high-demand situations, waiting can leave you with expensive rooms or no suitable rooms at all.

A better strategy is to monitor prices while keeping your options open.

Book Refundable, Then Keep Watching

This is one of the most practical tricks for flexible travellers.

Suppose you find a refundable hotel for $120 today. Book it if the cancellation terms are genuinely free and the room meets your needs. Then continue checking the same property.

If the price drops to $95, you can cancel the original reservation and book the cheaper rate, provided the first reservation can be cancelled without a fee.

Important: Check the cancellation deadline every time. A “free cancellation” rate may stop being refundable several days before arrival.

Try the Hotel Directly After Finding the Deal

Once you identify a hotel through a metasearch site, visit the property’s official website and compare the same room.

Hotels sometimes offer member rates, direct-booking promotions, breakfast packages or flexible cancellation terms that are not identical to third-party offers. Some hotel chains also have best-rate guarantees that can be useful when you find a qualifying lower price elsewhere.

You can also call the property for longer stays. If you’re staying for a week or booking several rooms, asking whether they have a direct rate is worthwhile.

Consider Last-Minute Deals Carefully

Last-minute booking can work particularly well when hotels have unsold rooms, but it is not a strategy for every trip.

Hotels.com’s 2026 data found meaningful savings among last-minute bookings, while HotelTonight is specifically designed around short-notice hotel inventory. NerdWallet’s recent testing also found that many same-day HotelTonight bookings were cheaper than comparable Booking.com prices, although non-refundable terms and limited inventory are important trade-offs.

Use this tactic when your destination has plenty of accommodation, and you can tolerate limited choice. Avoid it when travelling for weddings, major sporting events, festivals or conferences.

The Real How to Find Cheap Hotels Checklist

What to Check Why It Matters
Final price Headline rates can exclude important costs
Cancellation Protects you if plans change
Room type Cheapest rate may be for a different room
Location Transport can erase hotel savings
Breakfast Included food can change the real value
Check-in date A one-day shift can reduce rates
Booking window Prices can fall closer to arrival
Direct hotel rate May include better terms or perks

How to Find Genuinely Cheap Hotels

Practical Tricks That Actually Work

If you’re serious about how to find cheap hotels, build a repeatable process rather than searching randomly.

  • Start on Trivago or another metasearch platform, identify three comparable properties and record their prices.
  • Check the hotel’s own website next.
  • Then change your dates by one day, expand the location slightly and compare refundable versus non-refundable rates.
  • If the trip is still weeks away, set a price alert where available.
  • Trivago currently offers price alerts through its app for members, notifying users when prices change.
  • Also check whether you qualify for legitimate discounts such as AAA, AARP, military, corporate or loyalty rates.
  • Never use a discount code or eligibility rate you do not qualify for.
  • Most importantly, calculate the total trip cost, not simply the room rate.

FAQs on How to Find Cheap Hotels

1. Is Trivago cheaper than booking directly?

Not always. Trivago compares offers from multiple booking sites, so it is useful for finding price differences, but you should also check the hotel’s own website before booking.

2. What is the best time to book a hotel?

There is no universal rule. Current 2026 Hotels.com data identifies roughly the final two weeks before travel as a strong window in its analysis, but destination and demand can change the result considerably.

3. Is it cheaper to book hotels at the last minute?

Sometimes yes. Hotels may discount unsold inventory, but last-minute booking can backfire during busy periods. Flexibility is the key advantage.

Ultimately, how to find cheap hotels is less about discovering a secret website and more about comparing intelligently. Use metasearch to establish the market price, verify the final cost, experiment with your dates, check the hotel directly and keep watching when your reservation is refundable. Those small decisions can make a much bigger difference than chasing every supposed hotel-booking “hack.”

Also Read: How to Automate Instagram DMs with ManyChat: A Step-by-Step Guide

How to Build a Smart Home Under $300: A Room-by-Room Plan

How to Build a Smart Home Under $300: A Room-by-Room Plan

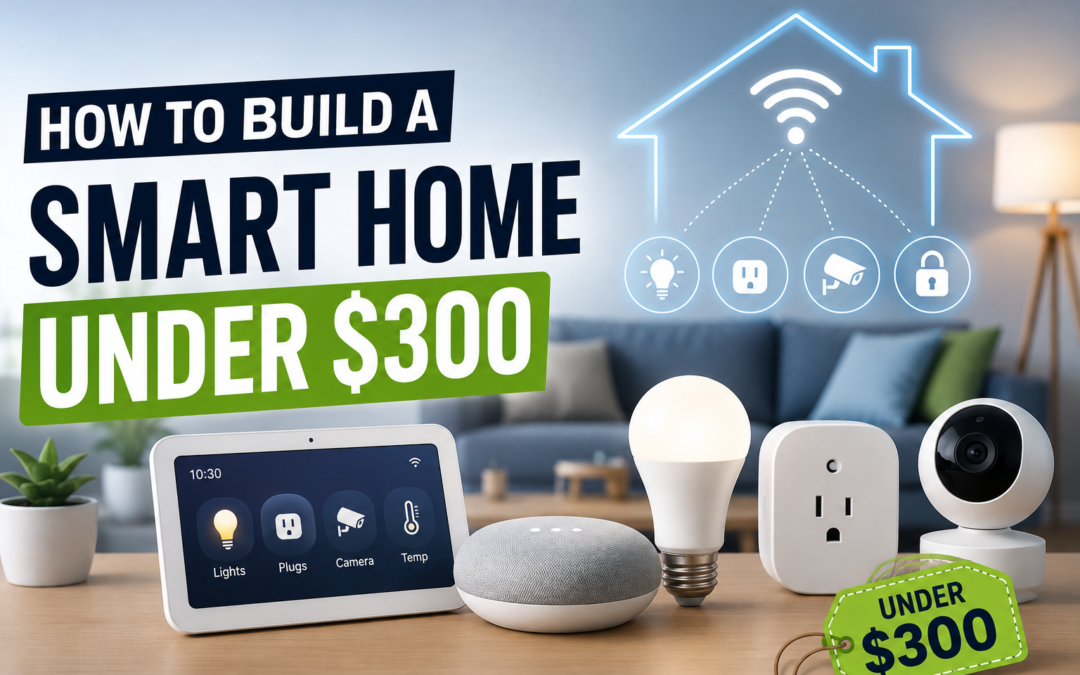
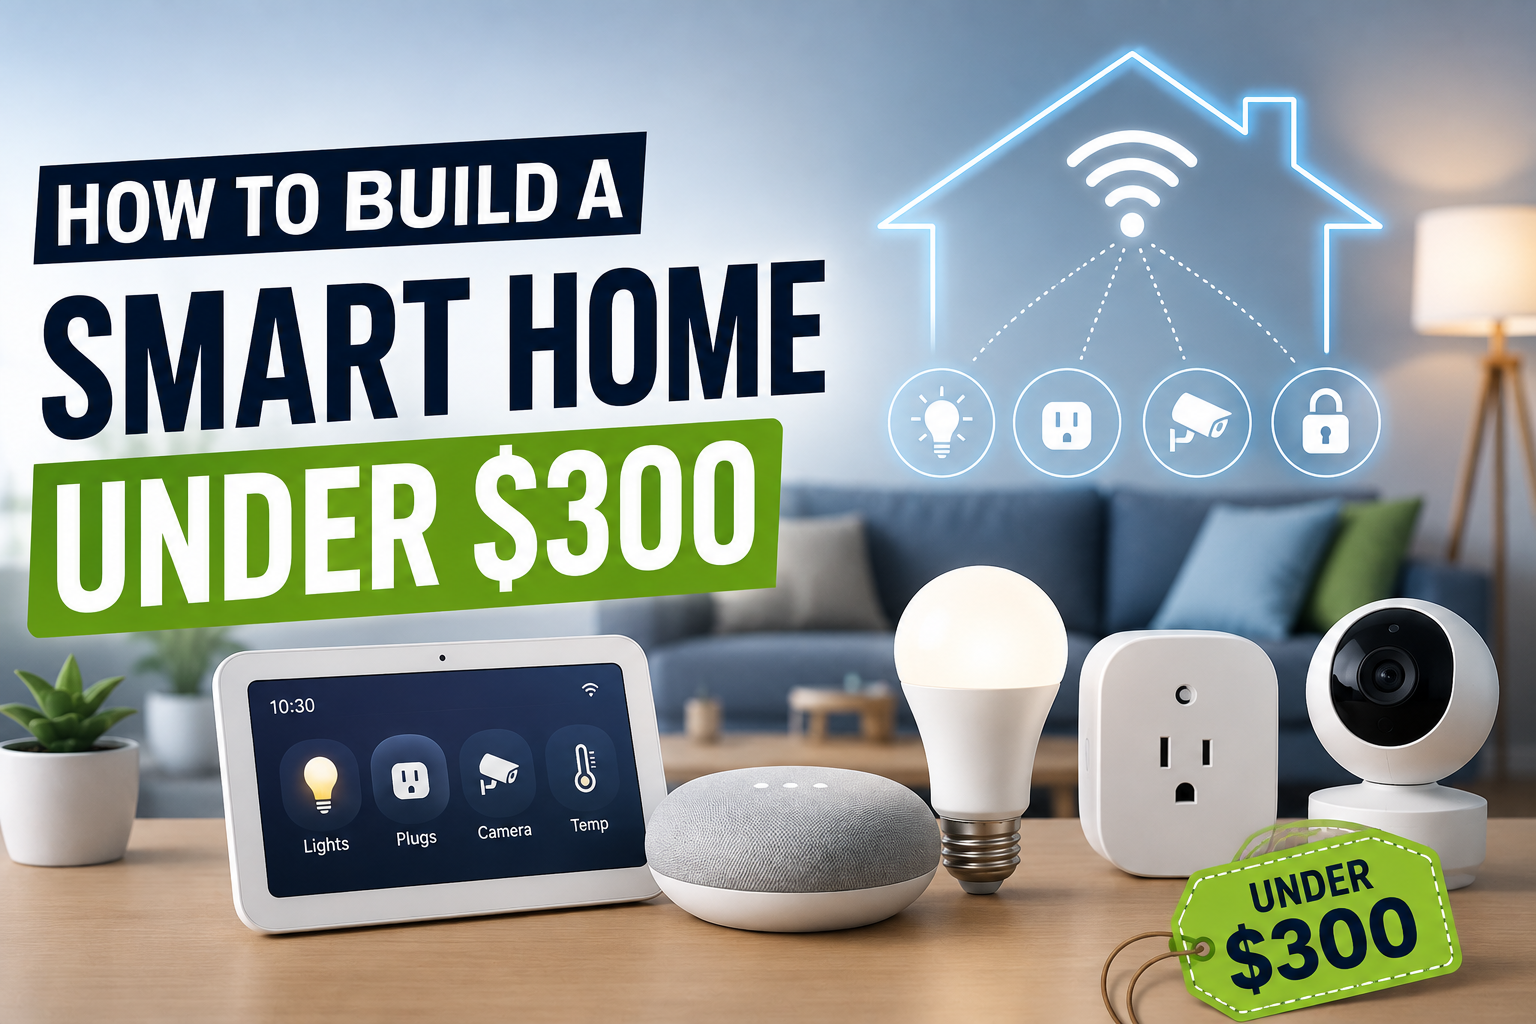
A smart home no longer requires a refrigerator that talks to your phone or a house full of expensive connected appliances. Building a smart home under $300 mainly means choosing a few devices that solve everyday problems and making them work together. A useful starter setup can cover lighting, plugs, motion-based automation, entertainment and basic security without replacing existing appliances. In 2026, compatibility also matters more than ever: Google Home supports Matter-enabled devices alongside compatible third-party products, while devices that depend entirely on cloud services can become unusable if a manufacturer changes or ends its service. Google, for example, notes that Wemo cloud-dependent features stopped working after January 31, 2026. Explore how to build a smart home under $300 in this guide.

how to build a smart home under $300

Start With One Ecosystem

The easiest way to waste a $300 budget is buying devices from five different ecosystems and discovering later that they do not cooperate properly.

Pick your primary platform first: Google Home, Amazon Alexa, Apple Home or another compatible system. If you are starting from scratch, Matter-certified products can make future expansion easier because Matter is designed to improve interoperability across supported smart-home platforms. Google Home can set up and manage Matter-enabled devices directly, provided the required compatible hub and network conditions are available.

You do not need to buy everything from one manufacturer. You simply need to check compatibility before buying each device.

The $300 Budget

Category Suggested Budget What to Buy
Smart speaker/hub $40-$60 Voice control and routines
Living room $45-$60 Smart plugs and lighting
Bedroom $40-$50 Bulb and sensor
Kitchen $30-$40 Smart plugs
Entryway $30-$40 Motion/contact sensor
Security $50-$60 Basic smart camera
Reserve $20-$30 Cables or replacement device
Total $255-$340 Adjust based on sales

Estimate prices.

To stay below $300, prioritize automation over buying a device for every possible function. The exact prices will vary by country, brand and promotions, so treat the figures as a planning budget rather than fixed retail prices.

Living Room: Make the Biggest Difference First

Start here because the living room usually has several devices that can benefit from automation. A smart bulb can handle scheduled lighting, while one or two smart plugs can control lamps, fans or other suitable appliances.

Add a smart speaker or display as the central control point. You can then create routines such as turning the lights on at sunset or switching off selected devices when you say a bedtime command.

Do not put high-power appliances into a smart plug unless the plug is specifically rated for that load. A smart plug is excellent for a lamp, but that does not automatically make it appropriate for every heater, cooler or high-wattage appliance.

Bedroom: Automate Around Your Routine

The bedroom does not need five smart devices. One adjustable smart bulb and a simple sensor can already create useful automation.

Set the lights to dim gradually before bedtime, switch them off automatically after you leave or turn on a low-brightness light when motion is detected during the night. The objective is not to make the room “smart” for its own sake. It is to remove small repetitive actions.

Practical tip: Keep a physical switch available. If your smart-home system fails, you should still be able to control the light manually.

Kitchen: Use Smart Plugs Carefully

The kitchen is where smart-home enthusiasm needs a little restraint. A smart plug can make sense for devices that are designed to restart safely when power is restored, but you should not remotely automate appliances that could create a fire, overheating or other safety risk.

A better starting point is a lamp, compatible coffee setup or another low-risk device. You can create routines around your morning schedule rather than buying expensive smart versions of appliances you already own.

Entryway: Add Sensors Before More Gadgets

A motion or contact sensor can provide more useful automation than another smart bulb.

A door sensor can trigger a notification when a door opens, while a motion sensor can turn on an entryway light when someone arrives. This is also where inexpensive automation starts to feel genuinely useful because the system reacts to what is happening rather than waiting for a voice command.

Security: One Camera Is Enough to Start

  • A basic indoor or outdoor smart camera can fit into the budget, but do not buy several cameras simply because they are inexpensive.
  • Start with the location where visibility matters most, such as the main entrance.
  • Pay attention to privacy controls, storage options, account security and whether recordings require a subscription.
  • A camera that sends everything to a cloud service may have different privacy implications from one offering local storage.

This matters because connected-home security is not just about the camera itself. Research has demonstrated that vulnerabilities in seemingly simple smart bulbs and plugs can potentially expose credentials and network information, showing why firmware updates and reputable products matter.

Where Automation Really Saves Money

A $300 smart home should not be judged by the number of devices installed. Its value comes from what those devices allow you to automate.

For example, a useful evening routine could switch off selected lights, turn off a suitable plug-controlled device and adjust other connected equipment with one command. A morning routine could turn on a lamp and provide a weather update while you prepare for work.

Google Home supports automations, voice commands and remote control for compatible devices, including Matter products.

That is far more useful than owning ten smart bulbs that you still control individually.

Recommended $300 Build

Room Product Approx. Budget
Living room Echo Dot 5th Gen $50
Living room 2 smart bulbs $25
Kitchen Tapo P125M 3-pack $25
Bedroom 2 smart bulbs $25
Entryway Motion/contact sensor $25-30
Security Wyze Cam v4 $45
Extra plugs 2-3 smart plugs $20-30
Estimated total $215-230

Prices may vary by site and location.

Avoid the Cloud-Only Trap

One of the biggest lessons for how to build a smart home under $300 successfully is to think about what happens five years from now.

A device may work perfectly today but become less useful if its manufacturer shuts down its cloud platform. Google’s documentation provides a current example with Wemo devices whose cloud-dependent functionality stopped working in 2026.

When comparing devices, look for Matter support, local control, physical controls and clear manufacturer support policies. You do not need every device to work offline, but having some local functionality makes the system less dependent on a company’s servers.

how to build a smart home under $300

A Better $300 Buying Strategy

Instead of spending the entire budget immediately, start with the central speaker or hub, two smart bulbs, two smart plugs and one sensor. Use them for a couple of weeks.

Then ask which routine you actually wish you had. If lighting is the biggest improvement, expand there. If you keep checking the front door, add a sensor or camera. If you discover that smart plugs are doing most of the useful work, buy more of them rather than chasing expensive gadgets.

This approach makes building a smart home under $300 much more practical because you spend based on actual behaviour rather than a shopping list.

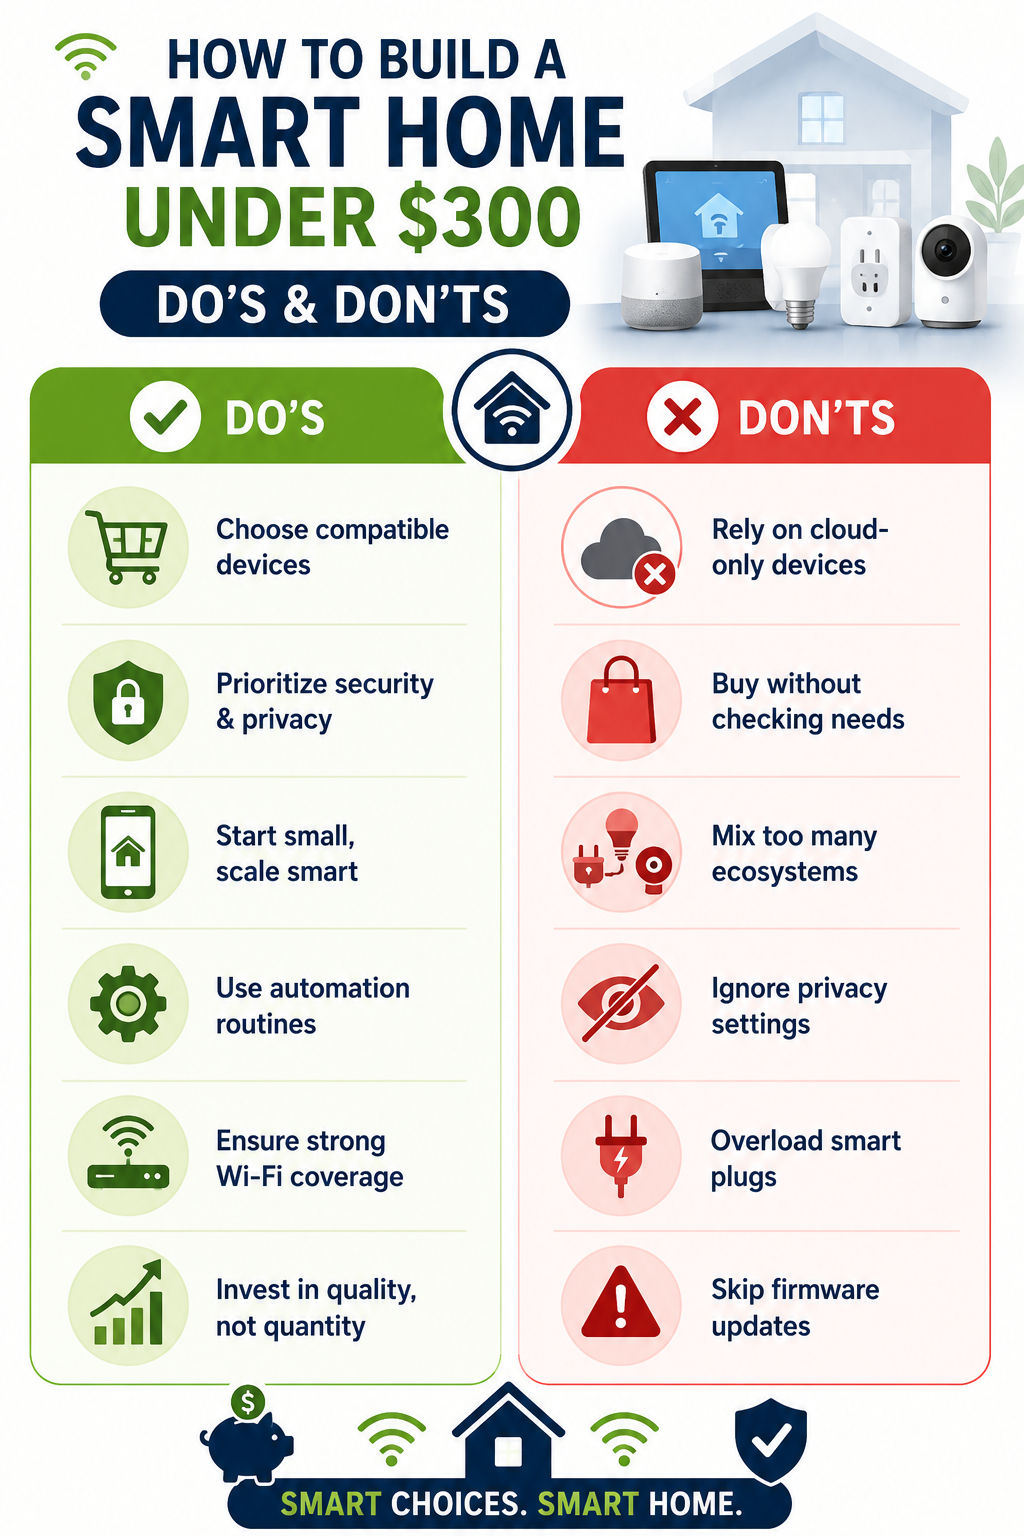
Practical Tips Before You Buy

  • Check compatibility first: Look for Matter or your chosen platform’s compatibility badge before ordering.
  • Measure Wi-Fi coverage: A device that repeatedly loses connection will ruin an otherwise good setup.
  • Keep physical controls: Smart functionality should add convenience, not remove basic manual control.
  • Update firmware: Install security updates when manufacturers release them.
  • Secure your account: Use a strong password and multifactor authentication where available.
  • Avoid unnecessary subscriptions: Check whether essential features require recurring payments.
  • Start with routines: Automations often provide more value than buying additional hardware.

Google recommends keeping devices close to the Wi-Fi router during setup, typically around 15-20 feet, to make initial pairing smoother.

Is $300 Really Enough?

Yes, if your definition of a smart home is useful automation rather than a showroom full of connected gadgets.

The strongest starter setup combines a voice assistant or hub, a handful of smart lights and plugs, one or two sensors and a carefully selected security device. How to build a smart home under $300 ultimately comes down to deciding which repetitive tasks are worth automating and refusing to spend money on technology that does not solve a real problem.

The best smart home is not necessarily the one with the most devices. It is the one where you stop reaching for your phone because the house already knows what you are likely to need.

Frequently Asked Questions on How to Build a Smart Home Under $300

1. Do all smart devices need a hub?

No. Some Wi-Fi devices connect directly to your router, while others using Matter, Thread, Zigbee, or similar technologies may require a compatible hub or controller. Check the requirements before purchasing.

2. Is Matter worth considering in 2026?

Yes, particularly if you expect to mix brands or change platforms later. Matter is designed to improve interoperability, although individual device capabilities can still vary between platforms.

3. Can a smart home work without internet?

Some devices and automations can continue working locally, depending on the hardware and controller. Cloud-dependent features such as remote access and some notifications may stop when the internet is unavailable. Choosing devices with local-control options can improve resilience.

For how to build a smart home under $300, the smartest purchase is not necessarily the cheapest device. It is the device that works with your existing setup, solves a genuine problem and remains useful if the manufacturer’s app or cloud service changes. Start small, automate the boring tasks first and leave enough of the budget for expansion once you know what your home actually needs.

Also Read: How to Switch Careers into Tech in 12 Months Using Online Courses