
Skip to content
US Edition · Tuesday, Sep 29 2026 Deals & brand guides updated daily
Humble Bundle Explained: How It Works and When It’s a Steal

Humble Bundle Explained: How It Works and When It’s a Steal

Humble Bundle is one of the more unusual ways for US gamers to buy PC games, ebooks, software and other digital products: instead of purchasing every title separately, you can sometimes get a themed collection for a fraction of the combined list price. The platform launched in 2010 with a focus on selling games while supporting charitable causes, and it has since expanded into a broader digital storefront, subscription service and publishing business. Humble says its community has raised more than $282 million for charity.

The important catch is that a bundle’s headline value isn’t automatically a reason to buy it. A $20 bundle containing $250 worth of games sounds incredible, but it isn’t a bargain if you already own six of the titles or have no interest in the remaining games. The real skill is identifying bundles where the games you actually want justify the price.

Humble Bundle Explained: How It Works and When It's a Steal

What Is Humble Bundle?

At its simplest, Humble groups several digital products around a theme and sells them together, often using different payment tiers. A bundle might focus on indie games, major PC releases, strategy titles, software, comics or ebooks.

The platform’s history is closely tied to charitable giving. Humble’s original model helped distinguish it from conventional game stores by allowing purchases to support developers, Humble and charitable organizations. The exact allocation can vary by product and checkout options, so buyers should look at the contribution information shown before completing a purchase.

The platform has also evolved beyond its original bundle model. It now includes individual games through the Humble Store and Humble Choice, a recurring subscription offering. Humble has described Choice as part of its broader service for gamers, while its bundles remain separate purchases rather than simply being another name for the subscription.

How a Typical Bundle Works

A bundle usually has a fixed price and a selection of products. Depending on the promotion, you may unlock more items by choosing a higher tier.

For a US PC gamer, the process generally looks like this:

  1. Find a bundle that interests you.
  2. Check every included title.
  3. Review the price tiers.
  4. Confirm the platform and redemption method.
  5. Purchase the tier you want.
  6. Redeem the included keys or download DRM-free content.

Many game bundles include keys that can be redeemed on platforms such as Steam, while some products may be DRM-free downloads or use another platform. The redemption platform is important because buying a bundle doesn’t necessarily mean every game becomes part of the same launcher library.

What to Check Why It Matters
Total bundle price Determines your actual spending
Games you want Measures the bundle’s real value
Games you own Prevents paying for duplicates
Redemption platform Confirms where you’ll play
DRM requirements Affects how the game is accessed
Tier structure Determines which titles you unlock
Regional restrictions Can affect key redemption
Charity information Shows where part of the purchase goes

When Is a Humble Bundle Actually a Steal?
When Is a Humble Bundle Actually a Steal?

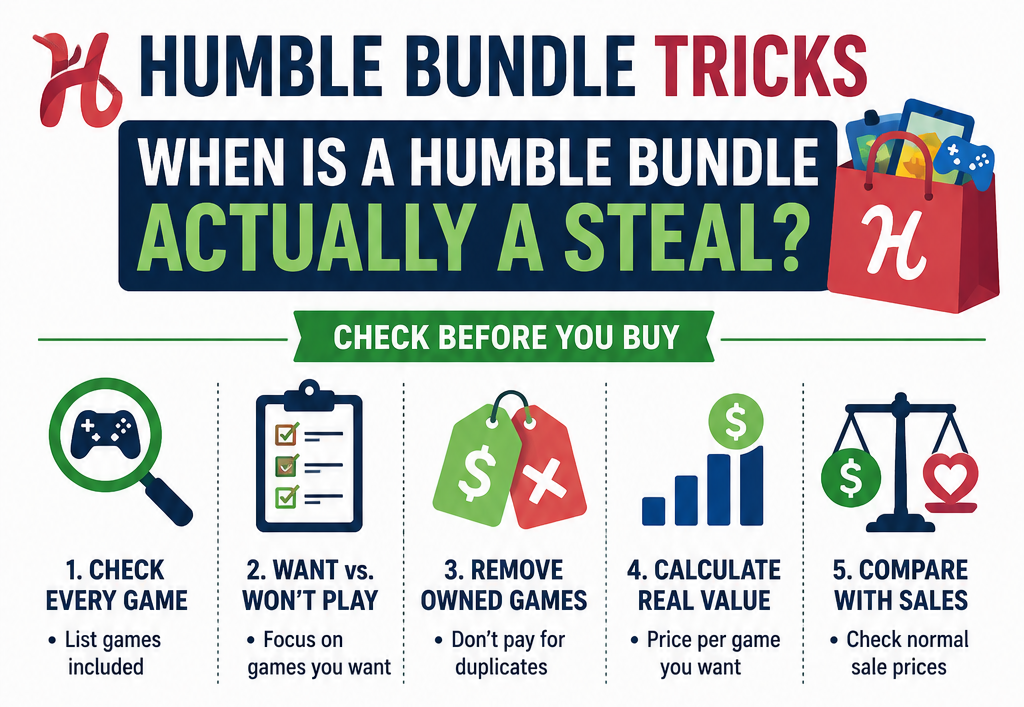
The biggest mistake is calculating value from the total retail price printed on the bundle page.

Instead, make a personal value calculation.

Suppose a $25 bundle contains eight games. You already own four, wouldn’t play two and genuinely want the remaining two. The bundle might advertise hundreds of dollars in combined value, but your personal value is based primarily on those two games.

There’s another useful test: compare the bundle against the lowest realistic price of the games you want.

If the two games you want frequently fall to $10 each during Steam sales, paying $25 for the bundle isn’t necessarily extraordinary. But if one of those games rarely receives discounts and the bundle includes it for an effective price of only a few dollars, the deal becomes much more compelling.

This is where Humble Bundle can be particularly attractive for PC gamers who are willing to explore outside their usual genres.

Don’t Ignore the Redemption Details

A cheap game isn’t necessarily useful if you cannot redeem it the way you expect.

Before buying, check whether each title is a Steam key, another platform key or a DRM-free download. A Steam key generally means you redeem the game through Steam rather than downloading it as a standalone Humble file. DRM-free products work differently.

Regional availability can matter as well. If you’re buying from the US, confirm that the key is available for your region before paying, particularly when a bundle contains games from different publishers.

Also check whether a bundle includes base games, DLC, expansions or coupons. A coupon for 50% off another game isn’t the same as receiving that game.

Humble Choice vs. Individual Bundles

Humble Choice makes sense for a different kind of buyer.

If you regularly play several PC games and like receiving a curated selection each month, a subscription can provide more predictable value. Humble’s earlier subscription service evolved into Choice, which offers a monthly collection of games and additional membership benefits.

But occasional buyers may be better off purchasing individual bundles. If you only see two or three games you want every few months, paying for a recurring membership can turn an otherwise inexpensive hobby purchase into an ongoing expense.

The question isn’t whether Choice is “better” than bundles. It’s whether you will consistently use enough of the monthly offering to justify the subscription.

What Makes a Bundle Worth Buying?

A good deal usually has three characteristics.

  • You actually want the games. Don’t let an enormous claimed value convince you to buy software that will sit untouched in your library.
  • The effective price beats normal sale pricing. Check what your desired titles typically cost during major US PC sales.
  • The bundle fits your existing library. Duplicate games reduce the practical value considerably.

There’s also an overlooked benefit: bundles can be an inexpensive way to discover smaller games. A title you would never spend $20 on individually can become worth trying when it costs only a few dollars as part of a larger collection.

When You Should Skip It

Skip a bundle when you’re buying primarily because the discount looks enormous.

You should also think twice if most of the included games are duplicates, if the games require a platform you don’t use, or if the bundle contains several titles you have no intention of playing.

Another warning sign is buying multiple bundles faster than you can play them. A $15 bundle isn’t a saving if it contributes another 20 games to an already enormous backlog.

FAQs

1. Is Humble Bundle legitimate?

Yes. Humble is an established digital storefront that launched in 2010 and sells games, ebooks and software through its own platform. It has also partnered with publishers and developers to distribute digital products.

2. Do Humble Bundle games work on Steam?

Many bundles include Steam keys, but not every product necessarily does. Always check the redemption method listed for each title before purchasing.

3. Is Humble Choice worth paying for?

It depends on how many of the included games you will actually play. Frequent PC gamers who regularly want several monthly titles may get substantial value, while occasional buyers may find individual bundles more economical.

Ultimately, the best Humble Bundle deals aren’t about how much the bundle claims to be worth; they’re about how much value you can actually use. Check the games, compare real sale prices, watch for duplicates, and make sure the redemption terms work for you. When the numbers and your gaming interests line up, a bundle can be one of the easiest ways to expand your library without overspending.
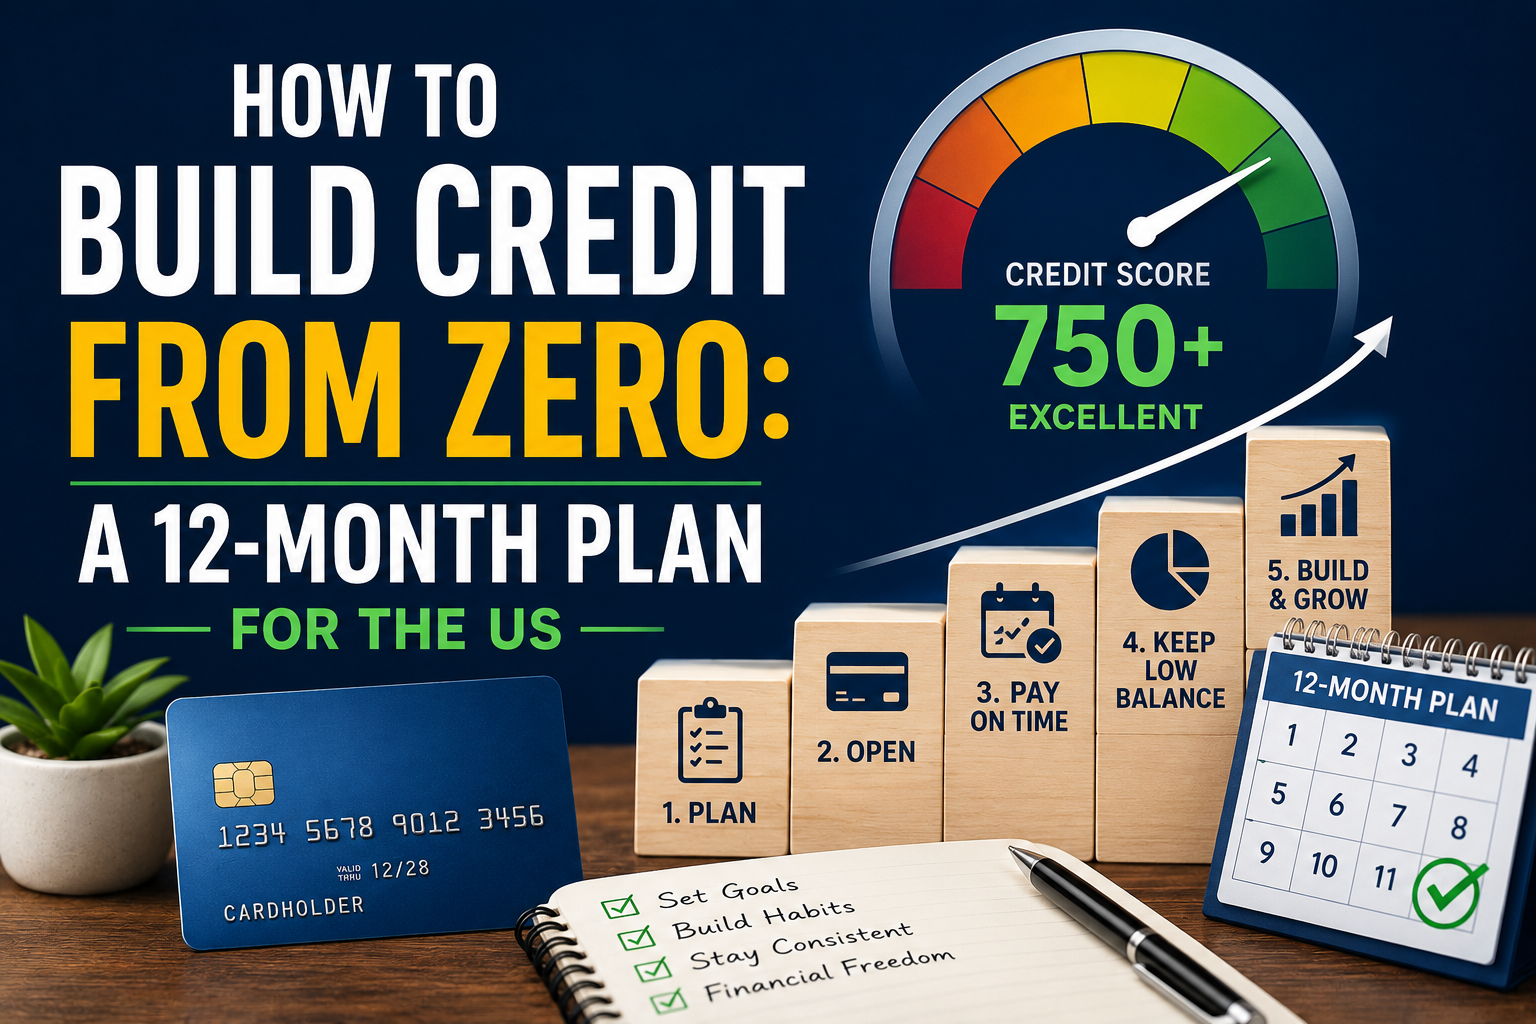
How to Build Credit from Zero: A 12-Month Plan for the US

How to Build Credit from Zero: A 12-Month Plan for the US

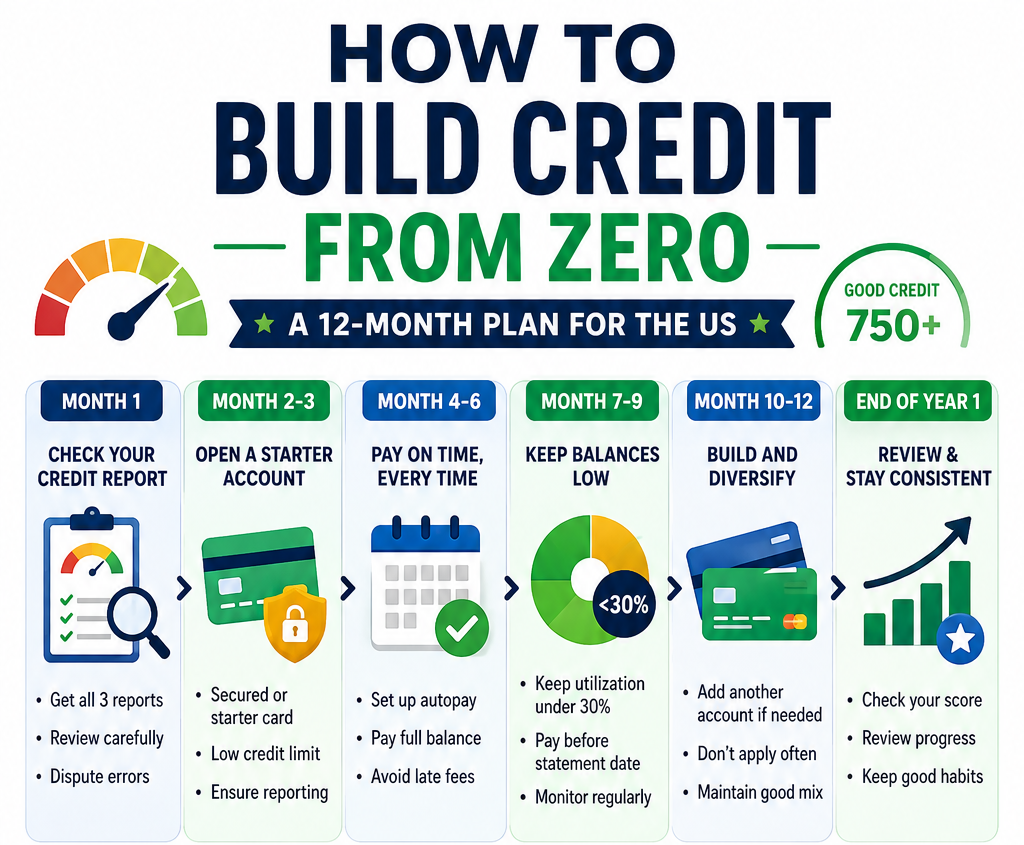
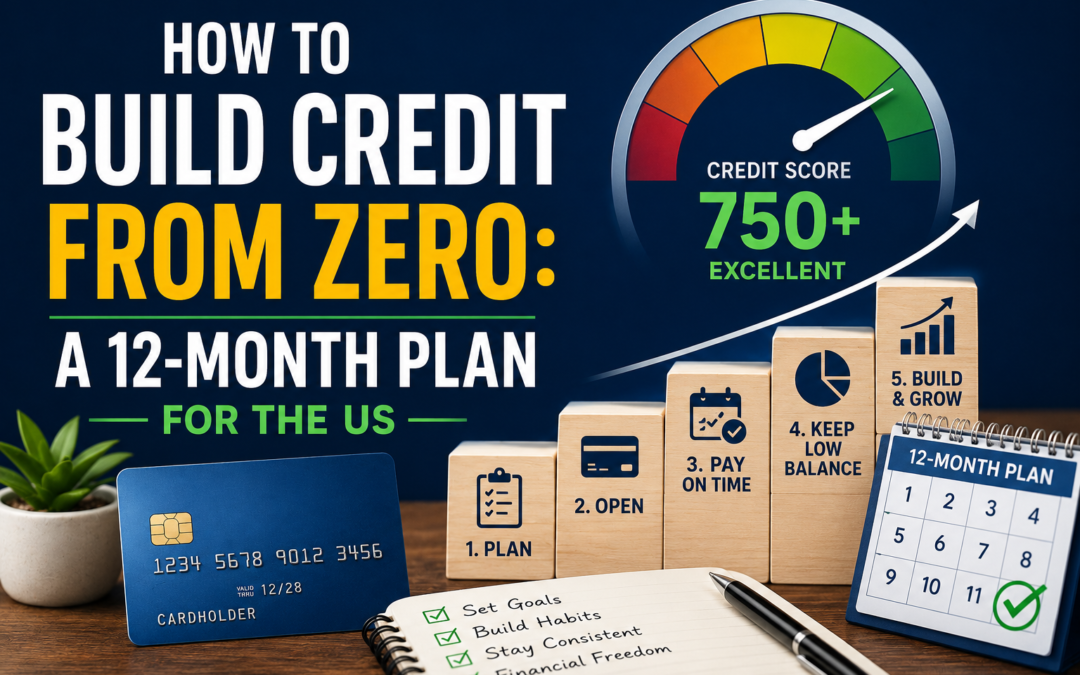
How to build credit from zero starts with one important reality: you do not need to borrow a large amount of money to establish a credit history. You need a small number of accounts that report to the major credit bureaus and a consistent record of paying them on time. A FICO Score generally cannot be generated until you have at least one account that has been open for six months and has reported within the previous six months.

For someone starting with no US credit history, the first year is about creating reliable financial behavior rather than chasing a particular score. FICO says payment history accounts for 35% of a typical score, amounts owed for 30%, length of credit history for 15%, and new credit and credit mix for 10% each. That makes the strategy fairly clear: open credit carefully, keep balances manageable and never miss payments.

How to Build Credit from Zero: A 12-Month Plan for the US

Month 1: Check What Actually Exists

Before applying for anything, check your credit reports. Even if you believe you have “no credit,” there could be an existing account, an incorrectly reported debt or information belonging to someone else with a similar identity.

In the US, you can obtain reports from Equifax, Experian and TransUnion through AnnualCreditReport.com. Checking your own report does not hurt your score.

If you find an error, dispute it with the credit reporting company and the business that supplied the information. Do not pay a company simply because it promises to create a credit history quickly.

Months 2-3: Open One Starter Account

For many people starting from zero, a secured credit card is one of the most straightforward options. You provide a refundable cash deposit, which generally establishes the card’s credit limit. The account can then report your payment activity to the credit bureaus. The CFPB specifically lists secured cards among the products that can help establish credit.

Another possibility is a conventional starter credit card designed for applicants with limited or no history. Compare annual fees, security deposits, APR and whether the issuer reports to all three major bureaus.

Do not apply for five cards at once. Multiple applications can create hard inquiries, and opening several accounts quickly can be particularly unhelpful when your credit history is thin.

Months 4-6: Build a Perfect Payment Routine

Now the goal is boring, and that’s exactly what you want.

Put one or two predictable expenses on the card, such as a streaming subscription, phone bill or grocery purchase. Keep the spending within your normal budget and pay the statement balance in full by the due date.

Autopay can help prevent an accidental missed payment, but don’t treat it as a substitute for checking your account. Make sure enough cash is available before the automatic payment is processed.

Timeline Main action What to avoid
Month 1 Check all credit reports Paying for unnecessary “credit repair”
Months 2-3 Open one starter/secured card Multiple applications
Months 4-6 Pay every statement on time Carrying unaffordable balances
Months 7-9 Review reports and utilization Closing your oldest account unnecessarily
Months 10-12 Evaluate whether another account is useful Applying simply to increase your score
End of Year 1 Review overall credit profile Chasing a specific score

Months 7-9: Watch Your Utilization

Paying on time is essential, but the amount reported on your revolving accounts matters too. FICO considers how much of your available revolving credit you’re using as part of the amounts-owed category.

Suppose your card has a $500 limit. A $400 reported balance represents 80% utilization, even if you intend to pay it in full a few days later. Because card issuers generally report around the statement cycle, the balance appearing on your report isn’t necessarily your current balance.

You don’t need to manufacture purchases just to “use” your card. The practical approach is to spend normally and pay the balance down before the statement closes if a high balance would otherwise be reported.

Months 10-12: Decide Whether You Need More Credit

By this stage, you may have enough history to generate a FICO Score, provided the account and reporting requirements are met.

Don’t automatically open another account because you’ve reached six months. Ask whether you actually need it. A second card can increase your available credit and eventually broaden your profile, but it also creates another account to manage.

Credit mix is only 10% of a FICO Score, so taking out an auto loan or personal loan purely to diversify your credit profile usually makes little financial sense. FICO itself says you don’t need one of every account type.

how to build credit from zero

The Credit Habits That Matter Most

If you’re wondering how to build credit from zero without getting trapped in debt, focus on four habits.

  • Pay every account on time. Payment history is the largest FICO category at 35%.
  • Don’t spend for the sake of building credit. A $1,000 purchase you don’t need does nothing useful if it creates interest charges or debt you cannot comfortably repay.
  • Keep older accounts in good standing. Length of credit history accounts for 15% of a FICO Score, and closing an older card can affect the age and available credit of your profile.
  • Apply selectively. New credit represents 10% of the FICO calculation, and multiple applications in a short period can create hard inquiries and reduce the average age of your accounts.

What Doesn’t Build Credit

Using a debit card or paying entirely with cash generally does not establish a traditional credit history because you’re not borrowing and repaying credit. The CFPB also warns that prepaid cards don’t build credit, and payday loans generally don’t help establish a positive credit history.

This is why simply having a bank account for years does not automatically produce a strong credit score.

FAQs on How to Build Credit From Zero

1. How long does it take to get a credit score from zero?

A FICO Score generally requires at least six months of qualifying credit history and recent reporting. Building a genuinely strong profile takes longer and depends on your payment record and overall credit management.

2. Is a secured credit card good for beginners?

It can be. A secured card requires a cash deposit and can help establish a credit history when the issuer reports the account to the credit bureaus.

3. Does checking my credit score hurt it?

Checking your own credit report is a soft inquiry and does not hurt your score. You can also obtain your reports through AnnualCreditReport.com without affecting your credit.

The most effective approach to how to build credit from zero is surprisingly uneventful: start with one manageable account, pay it on time every month, keep your balances under control and give the history time to accumulate. A year of consistent behavior is far more valuable than trying to create a complicated credit profile overnight.

How Money Transfer Fees Really Work (and How to Pay Less)

How Money Transfer Fees Really Work (and How to Pay Less)

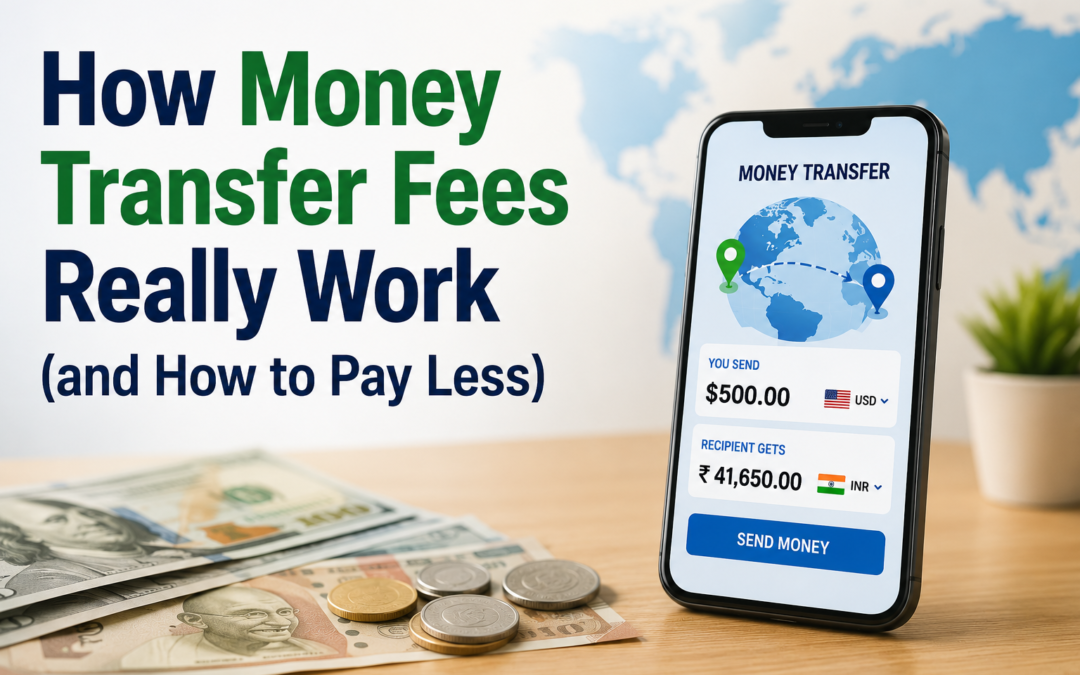
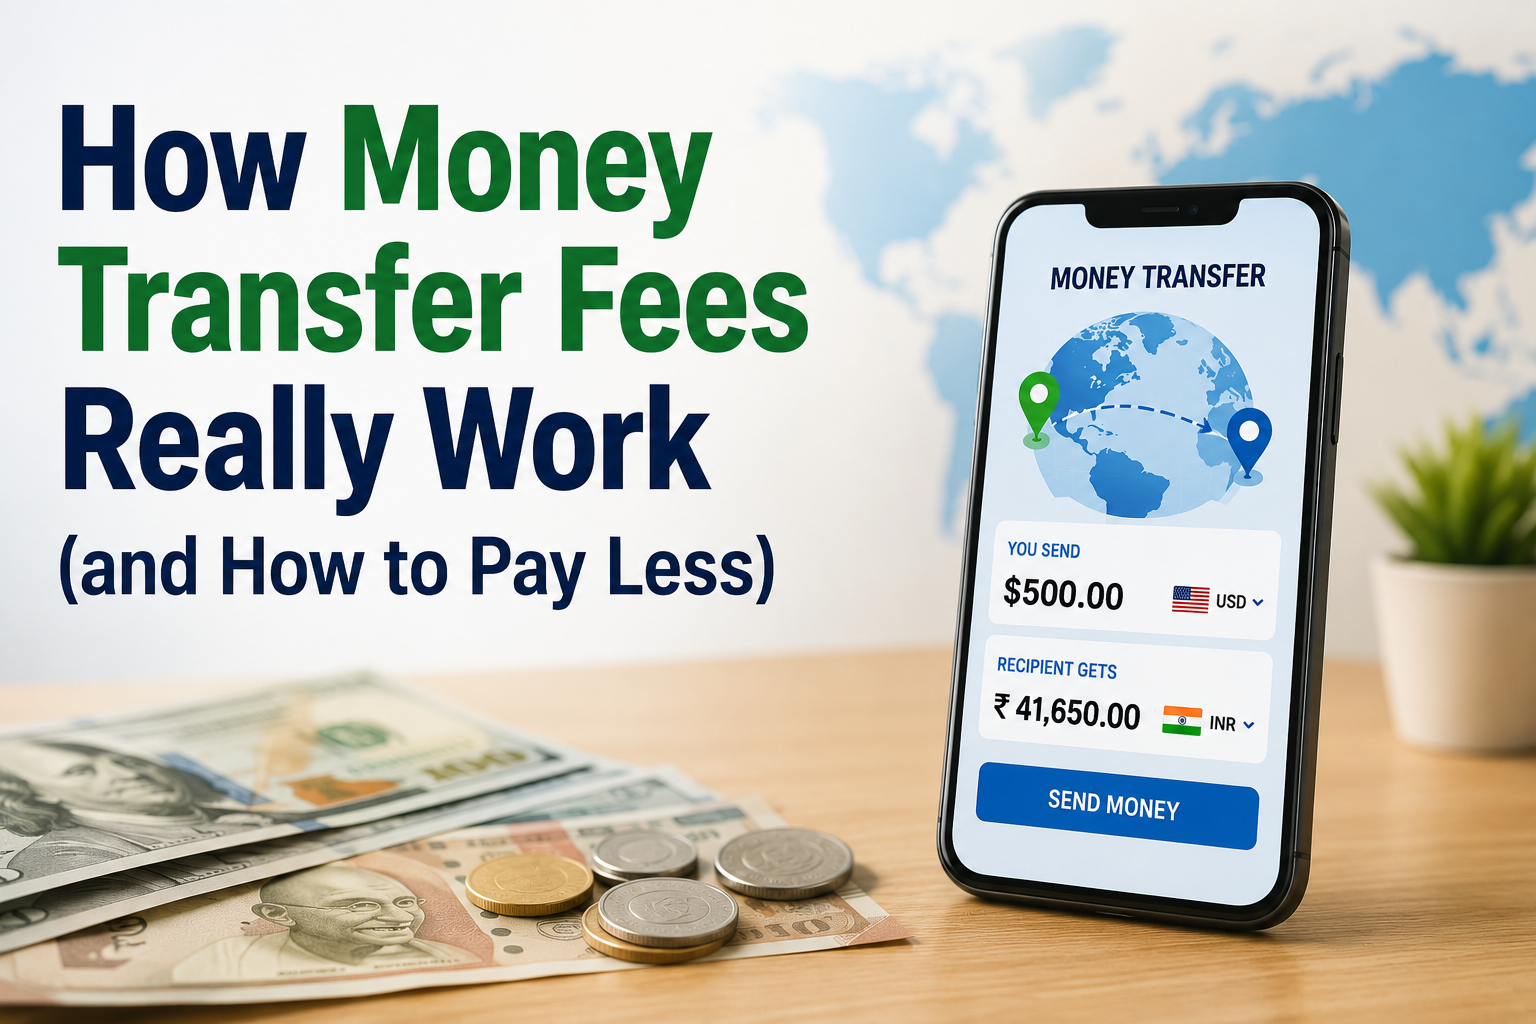
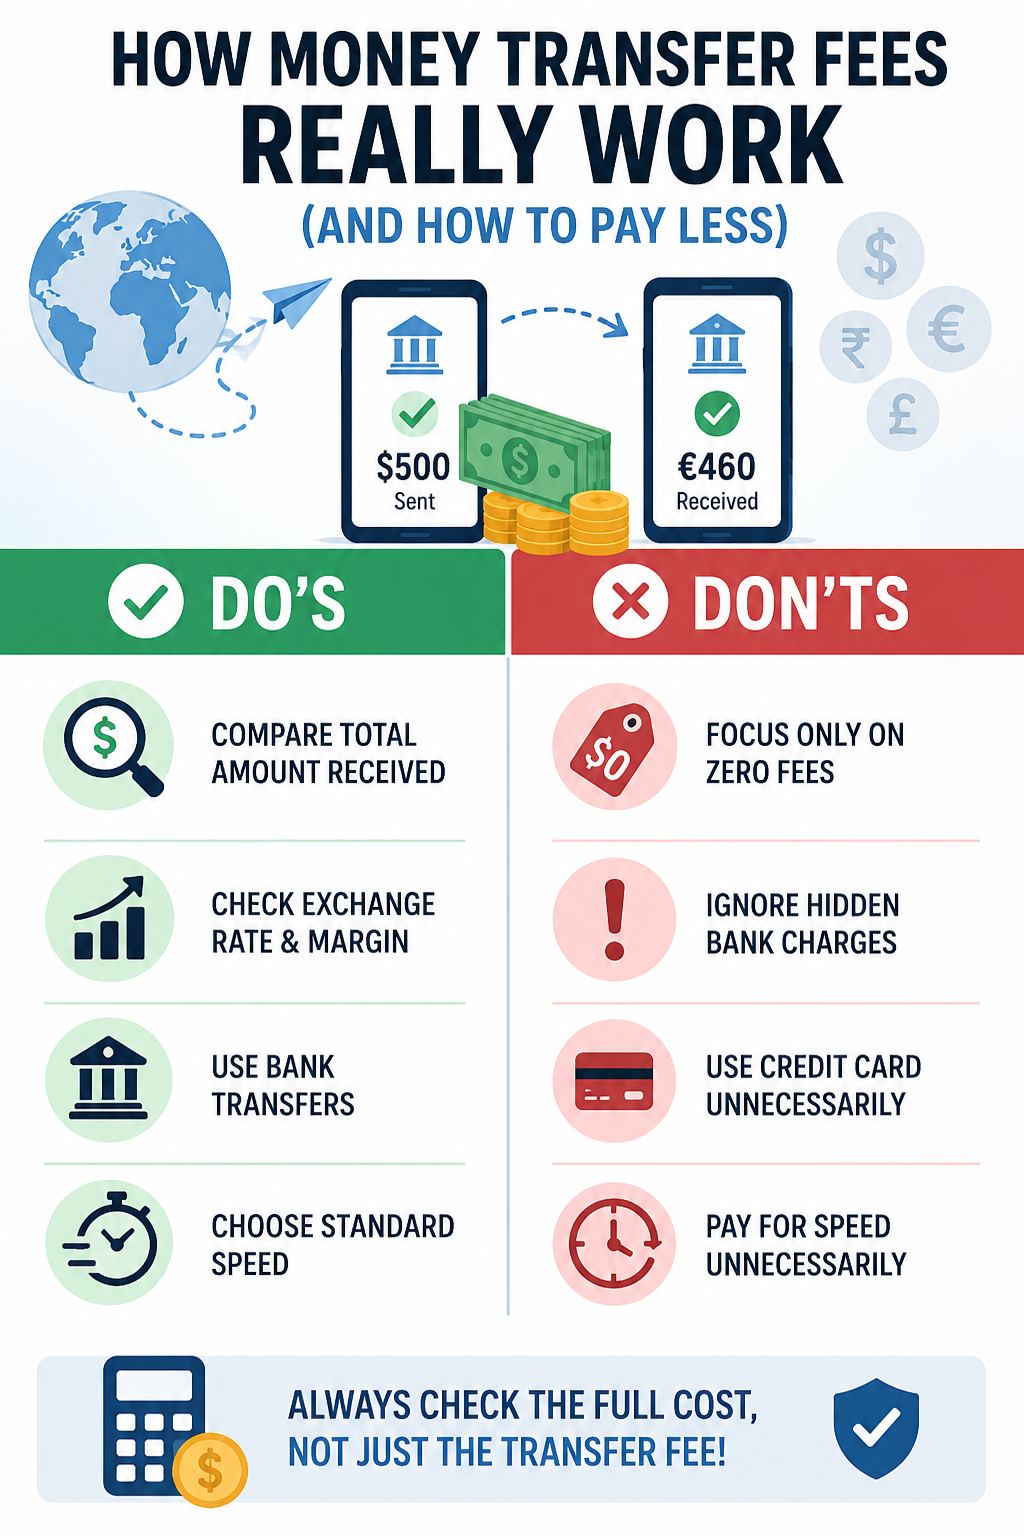
Money transfer fees are rarely just the number displayed beside the “send” button. For international transfers, the real cost can include an upfront transfer charge, an exchange-rate markup, payment-method fees and, in some cases, receiving or intermediary-bank charges. The World Bank’s latest Remittance Prices Worldwide data puts the average global cost of sending money at 6.36% of the amount transferred, showing why comparing only the advertised fee can give a misleading picture.

For example, a service advertising a $0 fee may still make money by offering an exchange rate below the market reference rate. Another provider might charge $5 upfront but give a much better exchange rate and leave the recipient with more money. The useful number is therefore not the fee on the screen; it is how much the recipient actually gets for the total amount you spend.

How Money Transfer Fees Really Work (and How to Pay Less)

The Four Costs Hidden Inside a Money Transfer

The first cost is the transfer fee, which may be a flat charge or a percentage of the amount sent. It can change depending on the destination, transfer size, speed and how you fund the transaction. Paying with a bank account may be priced differently from using a debit or credit card.

The second is the foreign-exchange (FX) margin. This is where many people underestimate the cost. If the market reference rate is 1 USD = 0.92 EUR but the provider uses 0.90 EUR, the 0.02 difference is effectively part of what you are paying. The World Bank specifically separates the transfer fee from the exchange-rate margin when calculating the total cost of remittances.

There can also be recipient and intermediary charges. A bank receiving an international wire may deduct a fee, while correspondent banks can sometimes take charges while the money is moving between institutions. These costs depend heavily on the transfer route and payment method.

Cost How it works What to check
Transfer fee Flat or percentage charge Fee before sending
FX margin Provider’s exchange rate differs from reference rate Rate received
Funding fee May apply to certain cards or payment methods Payment method
Receiving fee Recipient’s bank or provider may charge Amount received
Intermediary fee Third-party banks may deduct money Wire terms
Speed premium Faster delivery can cost more Delivery option

Why a “Zero-Fee” Transfer Isn’t Always Cheapest

A zero-fee promotion can be useful, but it should never be treated as proof that the transaction is inexpensive. If a provider makes $1,000 available to the recipient at a noticeably weaker exchange rate, the lost value can exceed the fee charged by another service.

The World Bank has found that exchange-rate margins are a significant component of remittance costs and notes that consumers often struggle to compare services because pricing combines several variables.

A simple calculation helps. Suppose you want the recipient to receive euros and you are comparing two providers:

  • Provider A: $5 transfer fee, better exchange rate
  • Provider B: $0 transfer fee, weaker exchange rate

If Provider A leaves the recipient with €920 after all costs while Provider B delivers €905, Provider A is actually cheaper despite charging a fee.

That is why the best comparison question is: “How much will the recipient receive, and how much will I have to pay?”

How to Compare Transfers Properly

When comparing services, start with the same sending amount, destination, payment method and delivery method. A quote for $500 to a bank account cannot fairly be compared with a quote for $500 in cash pickup if the providers price those services differently.

Then look at the exchange rate. Compare it with a reliable market reference rate and calculate the difference. You don’t necessarily need the mathematically perfect mid-market rate; you simply need a consistent benchmark across providers.

Speed also matters. If the recipient does not need the money immediately, don’t automatically select an instant or same-day option. Some providers price faster delivery differently, while a slower bank-funded transfer may be cheaper.

How Money Transfer Fees Really Work (and How to Pay Less)

Practical Ways to Pay Less

  • Compare the recipient’s final amount, not the headline fee. This is the single most useful habit when dealing with money transfer fees.
  • Use bank-funded transfers when appropriate. Some services price transfers funded directly from a bank account differently from card-funded transactions. Always check the final quote rather than assuming one method is cheaper.
  • Avoid unnecessary urgency. If the transfer can arrive in two or three days instead of minutes, compare both options. Paying for speed makes little sense when there is no deadline.
  • Compare before every large transfer. Prices change by corridor, amount and payment method. A provider that was cheapest last month may not be the cheapest today.
  • Watch promotional pricing. A first-transfer discount can make a service appear dramatically cheaper. Check what the normal rate and exchange rate will be after the promotion ends.
  • Consider consolidating transfers where practical. If you regularly send small amounts internationally, several separate transactions can expose you to repeated flat fees. Sending less frequently may reduce the impact of fixed charges, provided it fits your financial needs and doesn’t create unnecessary risk.

What About Domestic Transfers?

Domestic transfers work differently. In the US, for example, ACH transfers are generally used for electronic bank-to-bank payments, while wire transfers are commonly used when speed and finality are more important. The fee structure depends on the financial institution and the type of transfer.

For international payments, however, the exchange rate becomes an additional major consideration. This is why a domestic transfer costing a few dollars cannot be compared directly with an international remittance where currency conversion is involved.

The World Bank’s data also shows why digital and payment methods matter: total remittance costs can vary considerably depending on how the transaction is funded and how the recipient receives the money.

A Quick Checklist Before You Hit Send

Before confirming a transfer, check these seven numbers:

  1. Amount you pay
  2. Transfer fee
  3. Exchange rate
  4. Currency received
  5. Amount recipient receives
  6. Delivery time
  7. Any receiving or intermediary charges

If two providers show different fees, calculate the final amount received. If one offers a $0 fee but the recipient gets less money, the “free” transfer isn’t necessarily the better deal.

For larger transactions, also check cancellation rules, identity requirements and whether the quoted exchange rate is guaranteed for the period you need.

FAQs on Money Transfer Fees

1. Are Money Transfer Fees always charged separately?

No. Some providers charge an explicit fee, while others incorporate much of their revenue into the exchange-rate margin. Some promotions may remove the upfront fee altogether.

2. Is a lower transfer fee always better?

No. The exchange rate can have a larger effect than the visible fee, especially for larger international transfers. Compare the total amount the recipient receives.

3. How can I avoid hidden transfer costs?

Ask for the complete quote before confirming the transaction. Check the exchange rate, transfer fee, delivery method and final recipient amount rather than relying on the advertised fee.

The most important lesson is simple: a money transfer has a price even when the fee says $0. Once you start looking at the exchange rate and final amount received alongside the upfront charge, comparing providers becomes much easier and avoiding unnecessary costs becomes far more realistic.

How to Start Working Out After Years Off: A 4-Week On-Ramp

How to Start Working Out After Years Off: A 4-Week On-Ramp

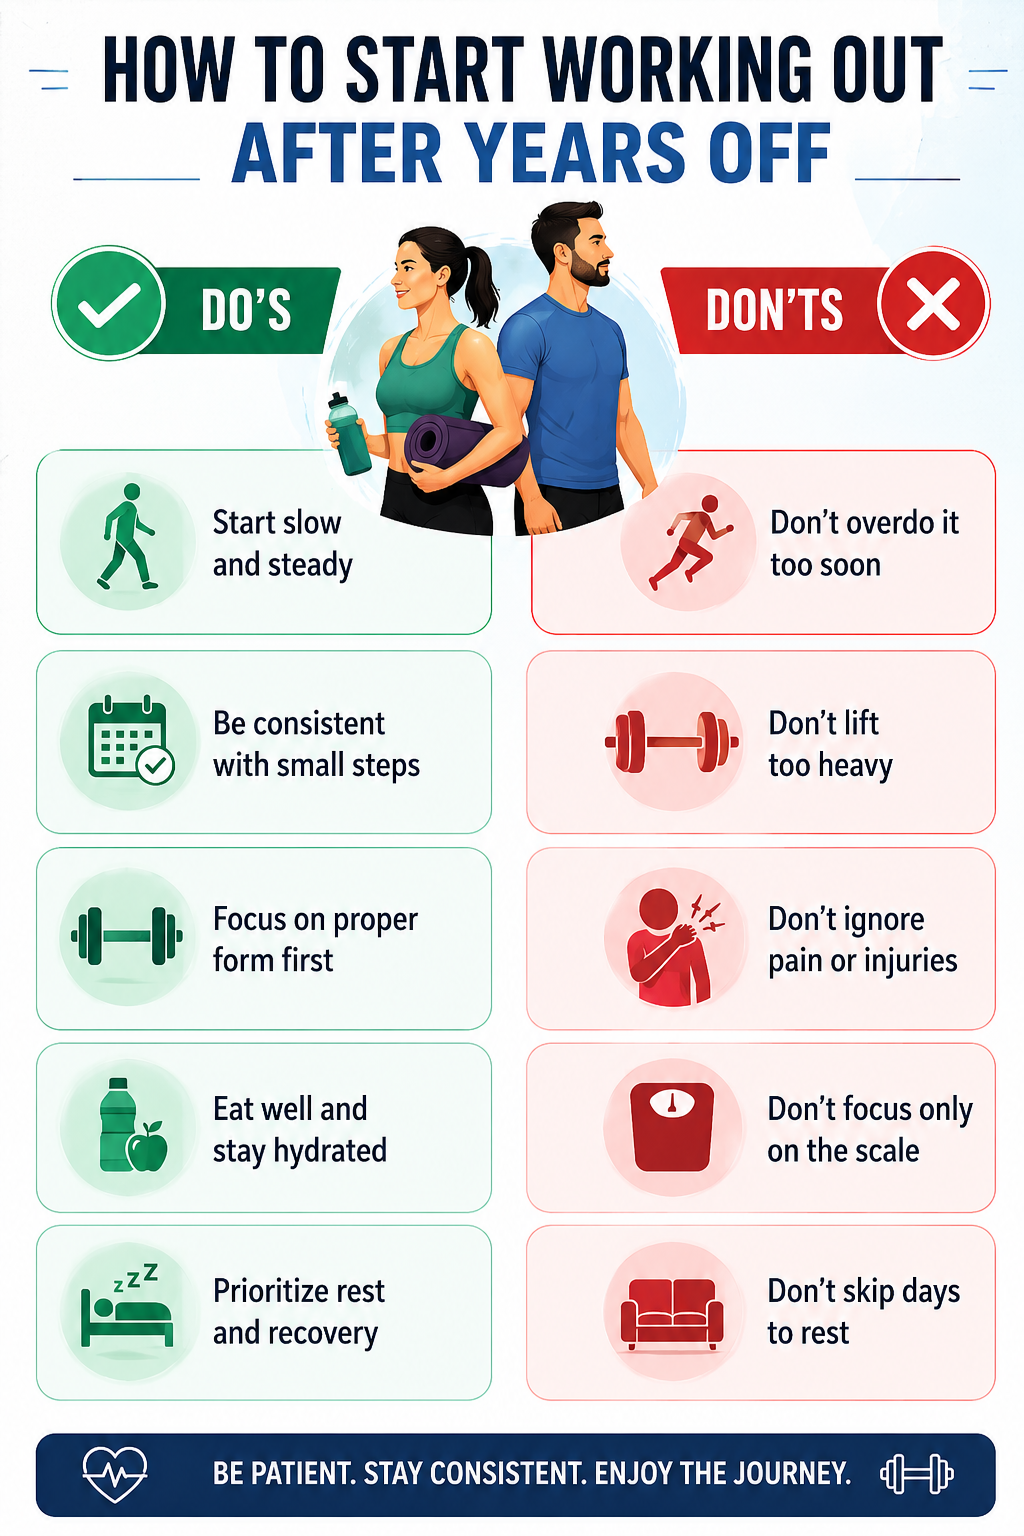
How to start working out after years off is less about finding the hardest workout and more about giving your body enough time to rebuild its tolerance for movement. If you have spent several years mostly inactive, jumping straight into five gym sessions a week can leave you with severe soreness, irritated joints or an injury that puts you back on the couch. The CDC recommends that adults eventually work toward 150 minutes of moderate-intensity activity each week plus muscle-strengthening activity on at least two days, but it also emphasizes that some activity is better than none and that people should build up gradually.

Wondering how to start working out after years off? Explore this helpful guide and start your routine today. The four-week plan below is designed as an on-ramp, not a fitness challenge. The goal is to finish the month feeling capable of doing more, not exhausted from trying to do everything immediately.

How to Start Working Out After Years Off: A 4-Week On-Ramp

Before You Start: Don’t Train at Your Old Fitness Level

Your previous ability is useful for motivation, but it is not a good guide for your first week back.

If you used to run 5K, squat heavy weights or play competitive sports, your cardiovascular fitness and movement skills may return faster than your tendons, joints and muscles can tolerate increased training.

Start with movements you can perform comfortably and leave several repetitions “in the tank.” During the first two weeks, finishing a workout feeling like you could have done more is a good sign.

If you have been inactive and are wondering how to start working out after years off, particularly if you have a chronic condition or disability, the CDC recommends discussing the appropriate activity level with a healthcare professional.

Your 4-Week Return-to-Exercise Plan

Here’s your routine on how to start working out after years off:

Week Cardio Strength Main Goal
Week 1 3 × 20-minute easy walks 2 × 20-25 minutes Reintroduce movement
Week 2 3 × 25-minute walks 2 × 25-30 minutes Build consistency
Week 3 3 × 30-minute walks + 1 optional easy session 3 × 30 minutes Increase workload carefully
Week 4 4 × 30-minute moderate sessions 3 × 30-40 minutes Establish a sustainable routine

Week 1: Make Exercise Feel Normal Again

Don’t worry about calories burned or how much weight you can lift.

  1. Monday: 20-minute easy walk
  2. Tuesday: Strength workout
  3. Wednesday: Rest or 10-15-minute relaxed walk
  4. Thursday: 20-minute easy walk
  5. Friday: Strength workout
  6. Saturday: 20-minute walk
  7. Sunday: Rest

For strength, perform one set of 8-12 repetitions of:

  • Chair or bodyweight squats
  • Wall or incline push-ups
  • Glute bridges
  • Resistance-band rows
  • Standing calf raises
  • Dead bugs or another comfortable core exercise

Keep the resistance light enough that your technique remains controlled. The CDC recommends 8-12 repetitions as a useful starting range for strengthening exercises.

Week 2: Add Time, Not Intensity

Your body has now had a week to adjust.

Increase walks to around 25 minutes and repeat the same basic strength movements. If you completed Week 1 comfortably, you can add a second set to two or three exercises rather than increasing the weight substantially.

A useful test is the talk test: during moderate activity, breathing should be noticeably harder, but you should still be able to speak in short sentences.

Don’t turn every walk into a race.

Week 3: Introduce a Real Training Rhythm

This is where your routine starts resembling regular exercise.

Try:

  1. Monday: Strength
  2. Tuesday: 30-minute brisk walk
  3. Wednesday: Strength
  4. Thursday: Rest or easy movement
  5. Friday: Strength
  6. Saturday: 30-minute walk
  7. Sunday: 30-minute easy walk

You can introduce slightly more resistance during strength sessions if the previous week’s sets felt controlled. Increase one variable at a time: either repetitions, resistance or total sets.

Do not simultaneously increase weight, workout duration and training frequency.

Week 4: Build the Habit You Can Keep

By Week 4, the objective isn’t to prove that you’re fit again. It’s to establish a schedule you can continue for the next three months.

  • Use three strength sessions and three to four moderate cardio sessions, with at least one easier day between harder sessions when needed.
  • You can also introduce short intervals during walking, for example, 2 minutes brisk + 3 minutes easy, repeated several times. There is no need to begin running yet.
  • The official target of 150 minutes of moderate activity is a longer-term destination, not a requirement you must hit during your first week back.

how to start working out after years off

How Hard Should Your First Workouts Feel?

A simple effort scale can prevent the most common mistake: doing too much because you feel motivated.

Aim for approximately 5-6 out of 10 effort during most sessions in the first two weeks. You should finish feeling worked, not destroyed.

Normal early-stage soreness can happen when muscles experience unfamiliar work. Persistent joint pain, sharp pain, chest discomfort, fainting, unusual shortness of breath or other concerning symptoms are different and should not be treated as something to “push through.”

Diet: Don’t Try to Fix Years of Inactivity in One Week

Exercise and food need to work together, but returning to the gym is not the right time for an extreme diet.

Build meals around four things:

  1. Protein: Eggs, Greek yogurt, chicken, fish, lean meat, tofu, beans or lentils.
  2. Carbohydrates: Rice, potatoes, oats, whole-grain bread, fruit and other minimally processed carbohydrate sources can provide useful training fuel.
  3. Vegetables and fruit: Aim for variety rather than obsessing over individual “superfoods.”
  4. Healthy fats: Nuts, seeds, avocado and olive oil can help round out meals.

If you exercise in the morning, you don’t necessarily need a large meal beforehand. A banana with yogurt, toast with eggs or oatmeal can be enough for an easier session. For longer or harder workouts, a meal containing carbohydrates and protein a few hours beforehand may be more comfortable.

Hydration matters too. Don’t wait until you’re extremely thirsty to start drinking, particularly when exercising in hot weather.

Nutrition strategies that support training should consider the type, amount and timing of food and fluids, according to the joint position of the Academy of Nutrition and Dietetics, Dietitians of Canada and the American College of Sports Medicine.

The Recovery Rule That Makes the Plan Work

Your workout is the stress. Recovery is when your body adapts to it.

For the first month, prioritize sleep, regular meals and rest days rather than trying to compensate for missed workouts.

If your legs are extremely sore after Tuesday’s workout, Wednesday does not have to become another hard training session. An easy walk can be more useful than forcing another demanding workout.

The CDC also recommends gradually increasing muscle-strengthening activity over time rather than starting at a high level immediately.

What to Do After the Four Weeks

If you complete the month without persistent pain or excessive fatigue, you can gradually move toward the standard adult target of 150 minutes of moderate aerobic activity and at least two strength sessions each week.

From there, choose a routine based on your actual life. Three 40-minute gym sessions that you consistently attend are more useful than an ambitious six-day program that lasts two weeks.

The most important part of how to start working out after years off is understanding that your first month is about rebuilding capacity and consistency. You don’t need your old fitness back immediately. You need a routine your body can tolerate and a schedule you genuinely want to repeat next week.

FAQs on How to Start Working Out After Years Off

1. How often should I work out after years of being inactive?

Start with 3-5 days of light-to-moderate movement, including two strength sessions during the first week. You don’t need to exercise intensely every day. Gradually increase duration, resistance and frequency as your body adapts.

2. Should I start with cardio or strength training?

Ideally, use both. Walking or another low-impact cardio activity rebuilds cardiovascular fitness, while basic resistance exercises help rebuild muscle strength. During the first week, keep both sessions relatively easy.

3. Is muscle soreness normal when returning to exercise?

Some muscle soreness is common after restarting exercise, particularly when muscles have not been trained for a long time. However, sharp pain, significant swelling or persistent joint pain isn’t something you should simply push through.

How to Shop AliExpress Safely: Sellers, Shipping, and Refunds

How to Shop AliExpress Safely: Sellers, Shipping, and Refunds

Wondering how to shop AliExpress safely? The shopping experience starts with understanding that AliExpress is a marketplace, not a single retailer. The platform connects shoppers with individual sellers, so the quality of the product, packaging, communication and fulfillment can differ substantially from one listing to another. That is why an attractive price alone is not enough. A safer purchase comes from checking the specific seller, reading recent buyer feedback, understanding the shipping method and knowing the protection period before placing the order. AliExpress provides Buyer Protection on orders, with the protection deadline shown in the order details, and its published guidance says buyers generally have 15 days after confirming receipt to apply for a refund.

The biggest mistake new shoppers make is treating AliExpress like a conventional U.S. retailer where every product follows the same return and delivery rules. It doesn’t. A few minutes of checking before payment can make a significant difference if something goes wrong.

How to Shop AliExpress Safely: Sellers, Shipping, and Refunds

Start With the Seller, Not the Price

Two sellers can offer what appears to be the exact same product at nearly identical prices while providing very different experiences.

Look at the seller’s overall feedback, but don’t stop there. The individual product listing matters more because a reputable store can still have a poor-performing product or a problematic variant.

how to shop AliExpress safely

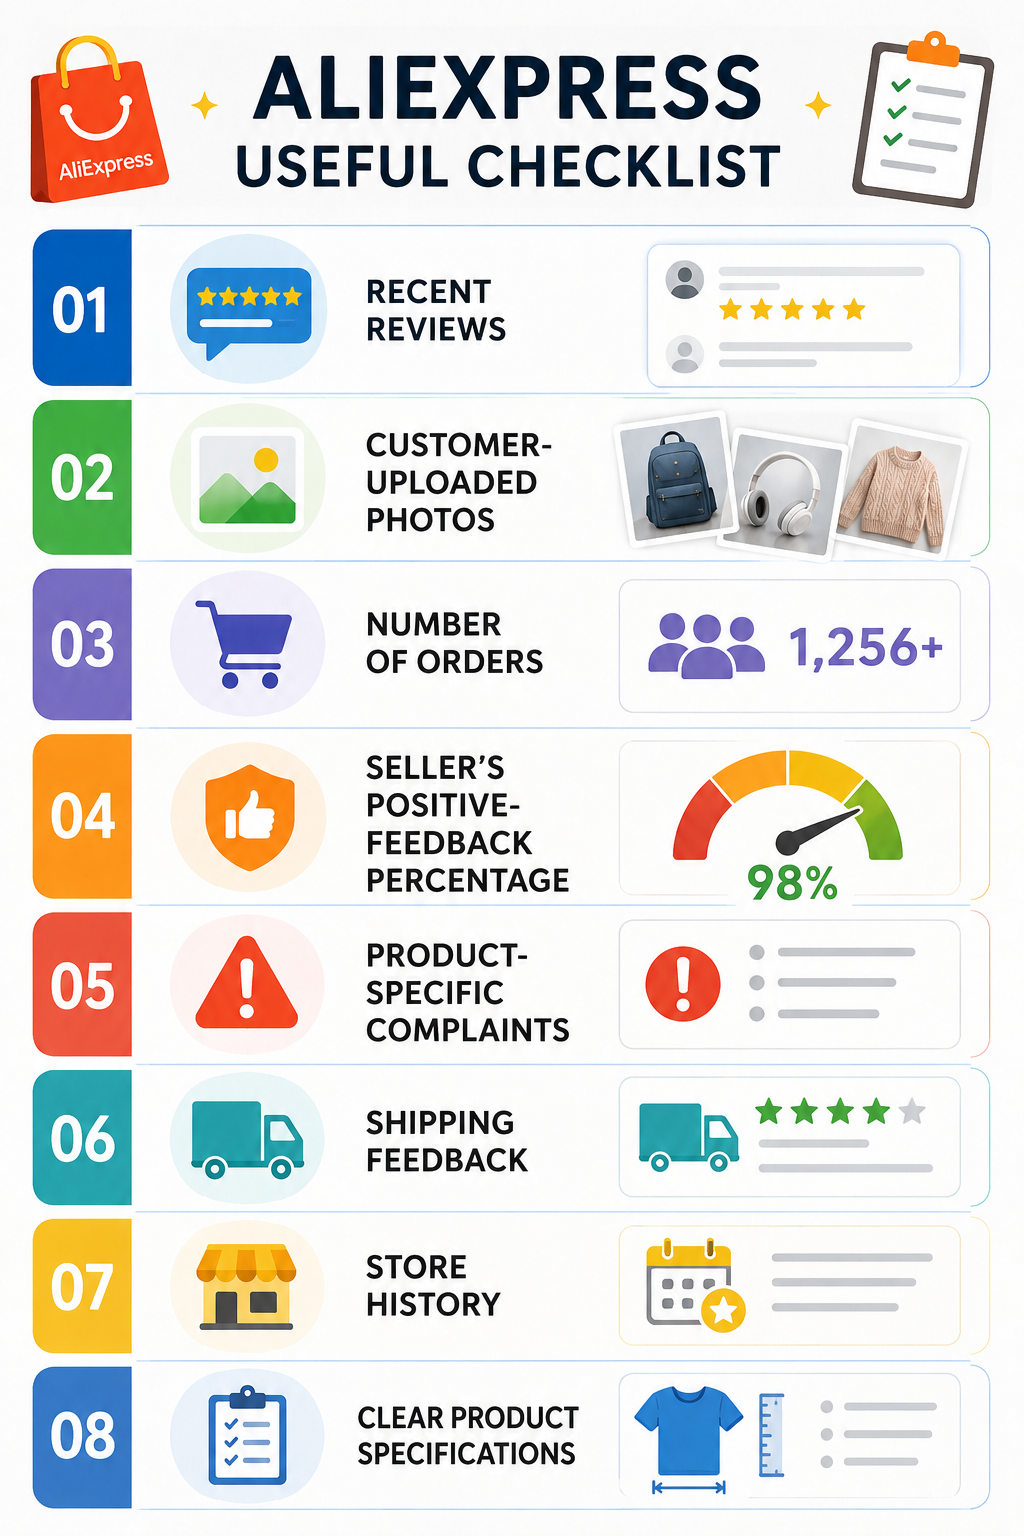
Recent reviews with photographs are particularly useful because they show what buyers actually received rather than what the promotional images promise. Independent 2026 shopping research also recommends comparing order volume, recent reviews, store history and the final checkout price rather than relying on one rating.

What to Check Better Signal Warning Sign
Seller rating Strong feedback + substantial history Very few transactions
Product reviews Recent, detailed, photo reviews Generic one-line reviews
Orders Hundreds/thousands of sales Almost no sales
Price Similar to competing listings Dramatically cheaper
Specifications Exact measurements/materials Vague description
Communication Clear answers Pressure to pay elsewhere
Shipping Trackable method Unclear tracking

Read the Bad Reviews First

Five-star reviews tell you what went right. One- and two-star reviews often tell you what could go wrong.

Look for repeated complaints, not isolated frustrations. If several customers mention the same issue- wrong dimensions, poor battery life, missing accessories, inaccurate color, or weak packaging-that pattern matters more than a high overall score.

Customer photos are equally important. For clothing, they can reveal the actual fit. For electronics and household products, they can show dimensions, materials and included accessories that aren’t obvious from the main listing.

This is one of the most useful rules for how to shop AliExpress safely: read reviews for the exact product and variant you intend to buy, not simply the store’s overall rating.

Be Suspicious of Prices That Make No Sense

AliExpress is known for competitive pricing, but an unusually low price deserves investigation.

Suppose three sellers list the same-looking product for $28, $31 and $34, while another seller offers it for $6. Don’t automatically assume you’ve found the bargain of the year.

Check whether the cheaper listing is actually selling the same version. It could be a smaller size, accessory-only listing, older model or product without the advertised components.

Also check the final checkout price. Shipping charges, taxes and other applicable costs can change the apparent bargain.

Understand Shipping Before You Pay

Shipping is one area where AliExpress differs significantly from domestic shopping.

Delivery time depends on the seller, warehouse, destination, logistics service and shipping method. Don’t choose a product that you need next week simply because the product page displays an attractive headline delivery estimate.

For important purchases, look for:

  • Tracking: A trackable shipment gives you considerably more visibility than an inexpensive method with limited tracking.
  • Estimated delivery date: Treat it as an estimate rather than a guarantee.
  • Shipping origin: Check whether the item is shipping internationally or from a warehouse closer to you.
  • Shipping cost: Compare the total delivered price rather than the product price alone.

AliExpress’s Choice service is another option worth examining. Alibaba describes Choice as a premium cross-border shopping service designed to improve the end-to-end shopping experience; in selected markets, Choice purchases can include benefits such as faster delivery, free shipping, free returns or delivery guarantees.

Don’t Take the Conversation Off AliExpress

This is one of the clearest safety rules.

If a seller asks you to pay through another website, send money directly, provide payment details through an outside channel or resolve a dispute privately in a way that bypasses AliExpress, stop.

Keep the payment, order details and important communication on the platform. That gives you a documented transaction history if you need to use the platform’s dispute process.

AliExpress’s published rules also prohibit misuse of Buyer Protection and require evidence supporting refund or dispute claims.

What Happens If the Order Goes Wrong?

If the item doesn’t arrive, arrives damaged or doesn’t match the listing, don’t simply accept the loss.

First, document the problem.

Take photographs of:

  • The outside packaging
  • Shipping label
  • Product condition
  • Damage
  • Missing components
  • Model or serial numbers
  • The product next to the listing if it differs materially

For a defective or inaccurate product, video evidence can be particularly useful. AliExpress’s dispute guidance specifically states that evidence is required for certain claims, including quality problems, damaged goods and items that are not as described.

Then use the dispute/refund process through the order page.

Don’t Wait Until the Protection Period Expires

This is where many buyers make an avoidable mistake.

Buyer Protection has a deadline. AliExpress says the relevant deadline is displayed in your order details, and its FAQ states that buyers generally have 15 days after confirming receipt to apply for a refund.

If you’re still waiting for an order or have discovered a serious problem, check the countdown rather than assuming you have unlimited time.

Understand “Free Return” Before Assuming It’s Free

A Free Return label applies only to participating products and sellers under AliExpress’s specific terms.

For eligible products, the published Free Return terms provide a 15-calendar-day return period from receipt or automatic confirmation, subject to the stated conditions. Participating buyers can open a dispute through the platform, and the service can provide prepaid return labels. The terms also contain exclusions and limits, so the label should be checked for the specific product before purchasing.

That distinction matters: not every AliExpress product automatically comes with the same free-return arrangement.

A Safer AliExpress Shopping Routine

If you’re wondering how to shop AliExpress safely, use this sequence before every meaningful purchase:

1. Compare three listings.
Don’t judge the first result.

2. Check the seller.
Look at feedback, history and order volume.

3. Read negative reviews.
Look for recurring problems.

4. Check buyer photos.
Compare the real product with the listing.

5. Confirm the exact variant.
Size, color, capacity, model and included accessories matter.

6. Check shipping.
Look at the delivery estimate, tracking and total cost.

7. Stay on AliExpress.
Don’t make side payments.

8. Save evidence.
Keep screenshots of the listing and take photos when the package arrives.

9. Check Buyer Protection.
Know your deadline before there is a problem.

10. Inspect before confirming everything is fine.
Don’t rush through the order simply because the package arrived.

What Should You Avoid Buying?

The safest strategy isn’t necessarily to avoid AliExpress altogether. It is to be selective about what you buy there.

Low-cost accessories, simple household items and non-critical products can be easier purchases to evaluate. Be more cautious with products where a failure could cause injury, property damage or significant financial loss.

For expensive electronics, compare the manufacturer’s specifications and warranty arrangements carefully. For electrical products, children’s products, safety equipment and other regulated goods, verify applicable certifications and recall information rather than relying solely on marketplace reviews.

FAQs on How to Shop AliExpress Safely

1. Is AliExpress safe for first-time buyers?

It can be, provided you evaluate the individual seller and product rather than assuming every listing has the same quality or return terms. Buyer Protection provides an additional layer of platform protection, but buyers must follow the applicable deadlines and evidence requirements.

2. What if my AliExpress order never arrives?

Check the tracking and Buyer Protection deadline first. If the order qualifies for a non-delivery claim, use the dispute process within the applicable protection period and provide the requested evidence.

3. Are AliExpress returns always free?

No. Free Return is tied to participating products and sellers and has specific conditions. Check the product’s return terms before purchasing rather than assuming every order qualifies.

Ultimately, how to shop AliExpress safely comes down to treating every purchase as a small piece of research: verify the seller, inspect the reviews, understand the shipping, keep everything on-platform and know your refund deadline before you need it.

Also Read: How to Start an Amazon FBA Business in 2026: Realistic Costs and Steps